- New employee guide
- Forgot password ?
- How to request leaves
- Using Team View
- My Calendar
- Cancel/Revoke leave requests
- Using TimeOff on mobile
- TimeOff feeds into Google and Outlook Calendars
- New manager guide
- Employees section for department manager
- How to action time off request
- Login type (enable Google/Microsoft SSO)
- Leave request created on behalf of employee
- Time in Lieu
- Heat map
- Import leaves in bulk
- Deactivating users
- Auto approval settings
- General Settings
- Team View Privacy modes
- How to backup employees' leave data
- Delete company account
- Employee policies
- Customizing Global Settings for Individual Employees
- Block selected leave types
- Individual limits for leave types
- How to disable weekly who is off emails
- Unused allowance reminder
- End of the year guide Carry over section
- End-of-Year Guide: Managing PTO/Allowance Limits
- Blackouts and company events
- Reports
General Settings
The General Settings section is divided into a few key areas for easy navigation.
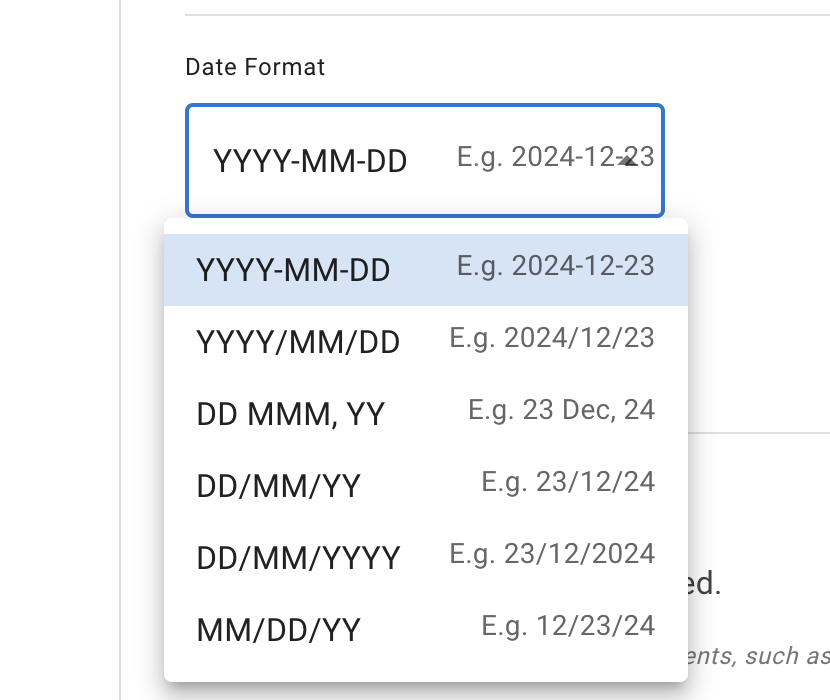
1. General Company Details: This section allows you to add your company name, country, and time zone. An important step here is selecting a date format that is convenient and familiar for your company, as all leave data will be presented in this format.

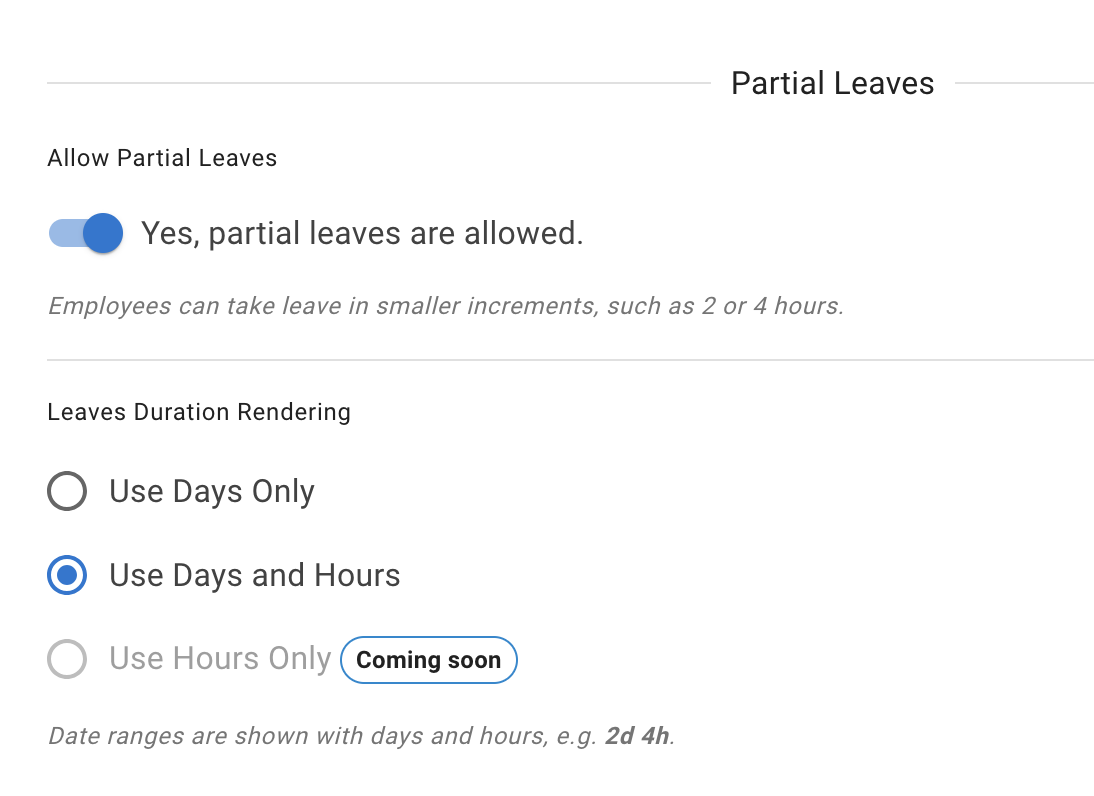
2. Partial Leave Settings.
The Partial Leave section includes a toggle to enable or disable partial leave bookings by employees. It also defines the format in which leave durations are displayed.For example:
- Days Only Format: Displays 2 and a half days as "2.5 days".
- Days and Hours Format: Displays the same as "2 days and 4 hours" (assuming a nominal workday of 8 hours).
Coming soon: Hours Format will allow all leave data to be represented entirely in hours for even greater flexibility.

3. Leave Data Privacy Settings.
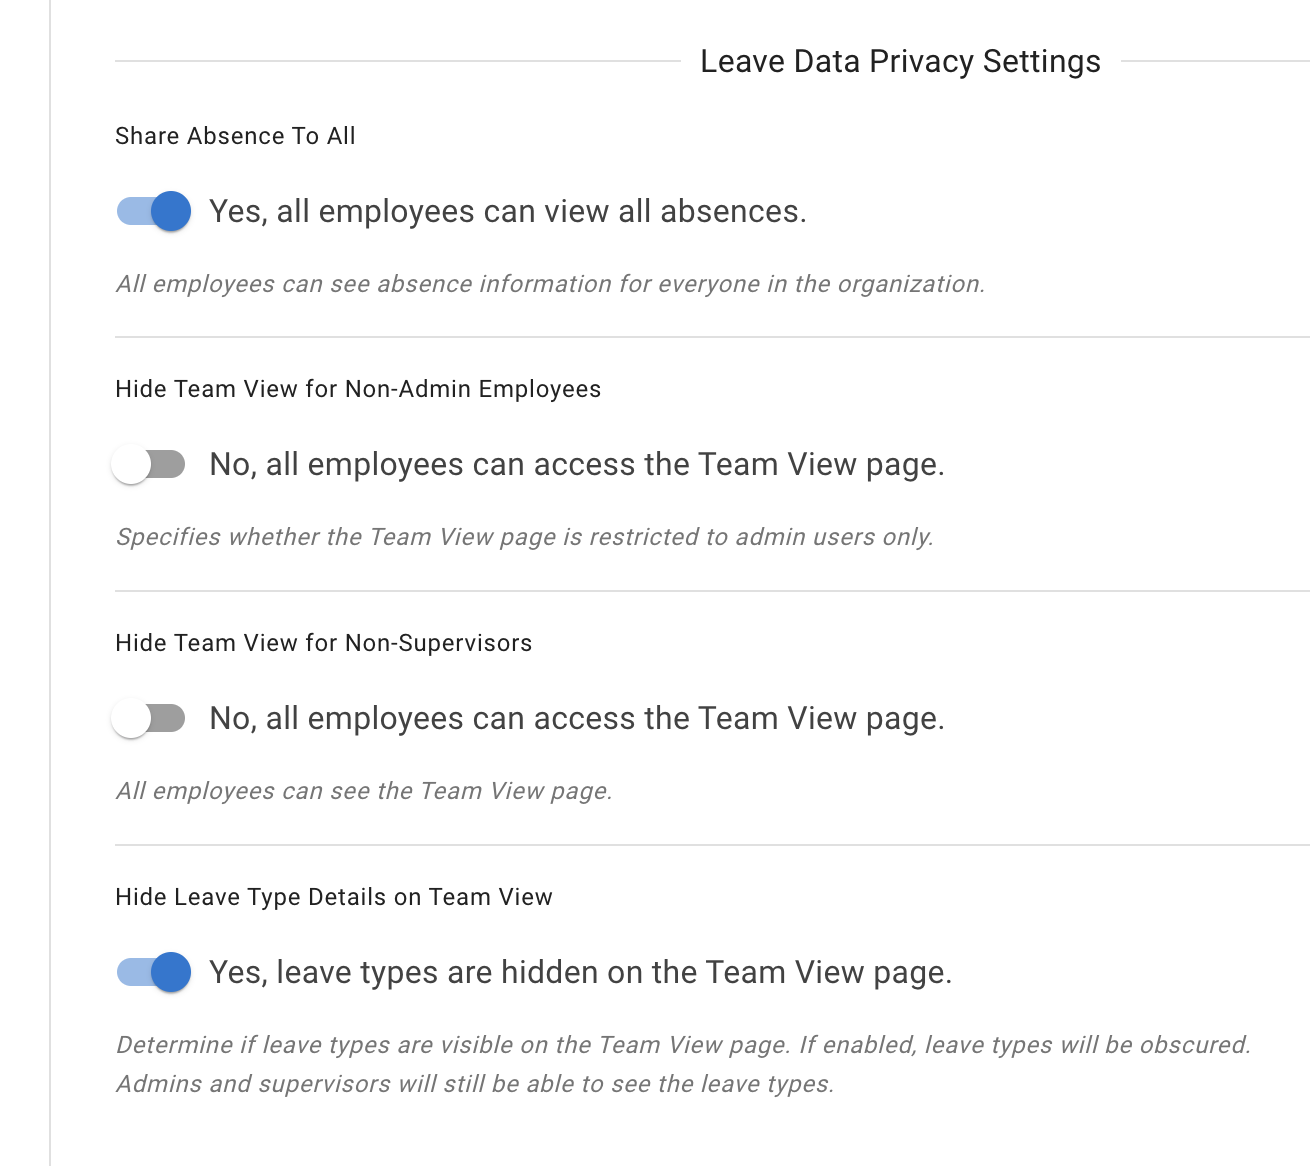
The Leave Data Privacy Settings section gives administrators the ability to customize Team View based on company policies.
There are several options to choose from:
- Default Team View (No toggles selected):Employees can view leave data only for colleagues within their own department. They can see the reason for their colleagues’ absences, such as sick leave or working from home.
- Share Absence with All (Toggle enabled):Leave data is shared across all employees, regardless of department.
- Restricted to Administrators and Supervisors:Only administrators and supervisors have access to Team View.
- Strict Admin-Only View:Access to Team View is limited exclusively to administrators.
These settings ensure your company can strike the right balance between transparency and privacy, aligned with your internal policies.

4. Company Backup Data.
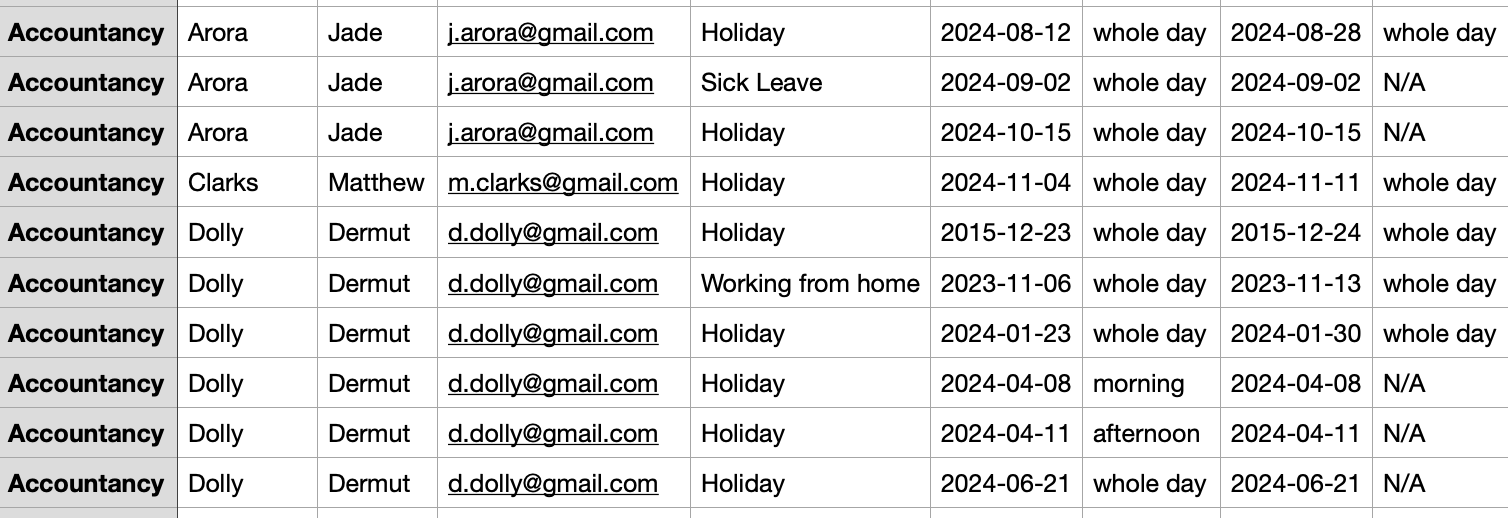
The Company Backup Data section is an essential tool for safeguarding your employee information. We recommend periodically backing up employee data, especially if you plan to deactivate or remove employees from the company list.The backup generates a CSV file containing all relevant information, as shown in the example below, ensuring you always have a secure and accessible record of your data.
The Company Backup Data section is an essential tool for safeguarding your employee information. We recommend periodically backing up employee data, especially if you plan to deactivate or remove employees from the company list.The backup generates a CSV file containing all relevant information, as shown in the example below, ensuring you always have a secure and accessible record of your data.

5. Delete Company Account.
The Delete Company Account section is the final step for permanently removing your account.
A word of warning: Before proceeding, please ensure you back up your employee data as explained above. Deleting your account is an irreversible action, and all employee data will be permanently wiped from our database in compliance with GDPR regulations.Once deleted, we do not store any information and cannot reinstate the account if it was deleted by mistake. Proceed with caution to avoid unintended data loss.

