Leave request created on behalf of employee
Admins and supervisors can create leave requests for employees they manage.
This is useful when:
- an employee is ill
- an employee cannot access TimeOff.Management
- a manager needs to record an agreed absence
- historical leave needs to be added
- an existing leave record was missed
The normal New Absence form is used. It includes an extra field for selecting the employee.
Who can create employee leave?
Access depends on the user’s role and company permissions.
- Admins can normally create leave for anyone in the company.
- Supervisors can create leave for employees in the departments they manage.
- Secondary Supervisors may also have access where enabled.
A manager will not be able to select an employee they do not have permission to manage.
Create the leave request
To add leave for an employee:
- Select New Absence.
- Choose the employee.
- Select the leave type.
- Enter the date or date range.
- Choose the duration.
- Add a comment if needed.
- Choose whether to send an email notification.
- Submit the request.
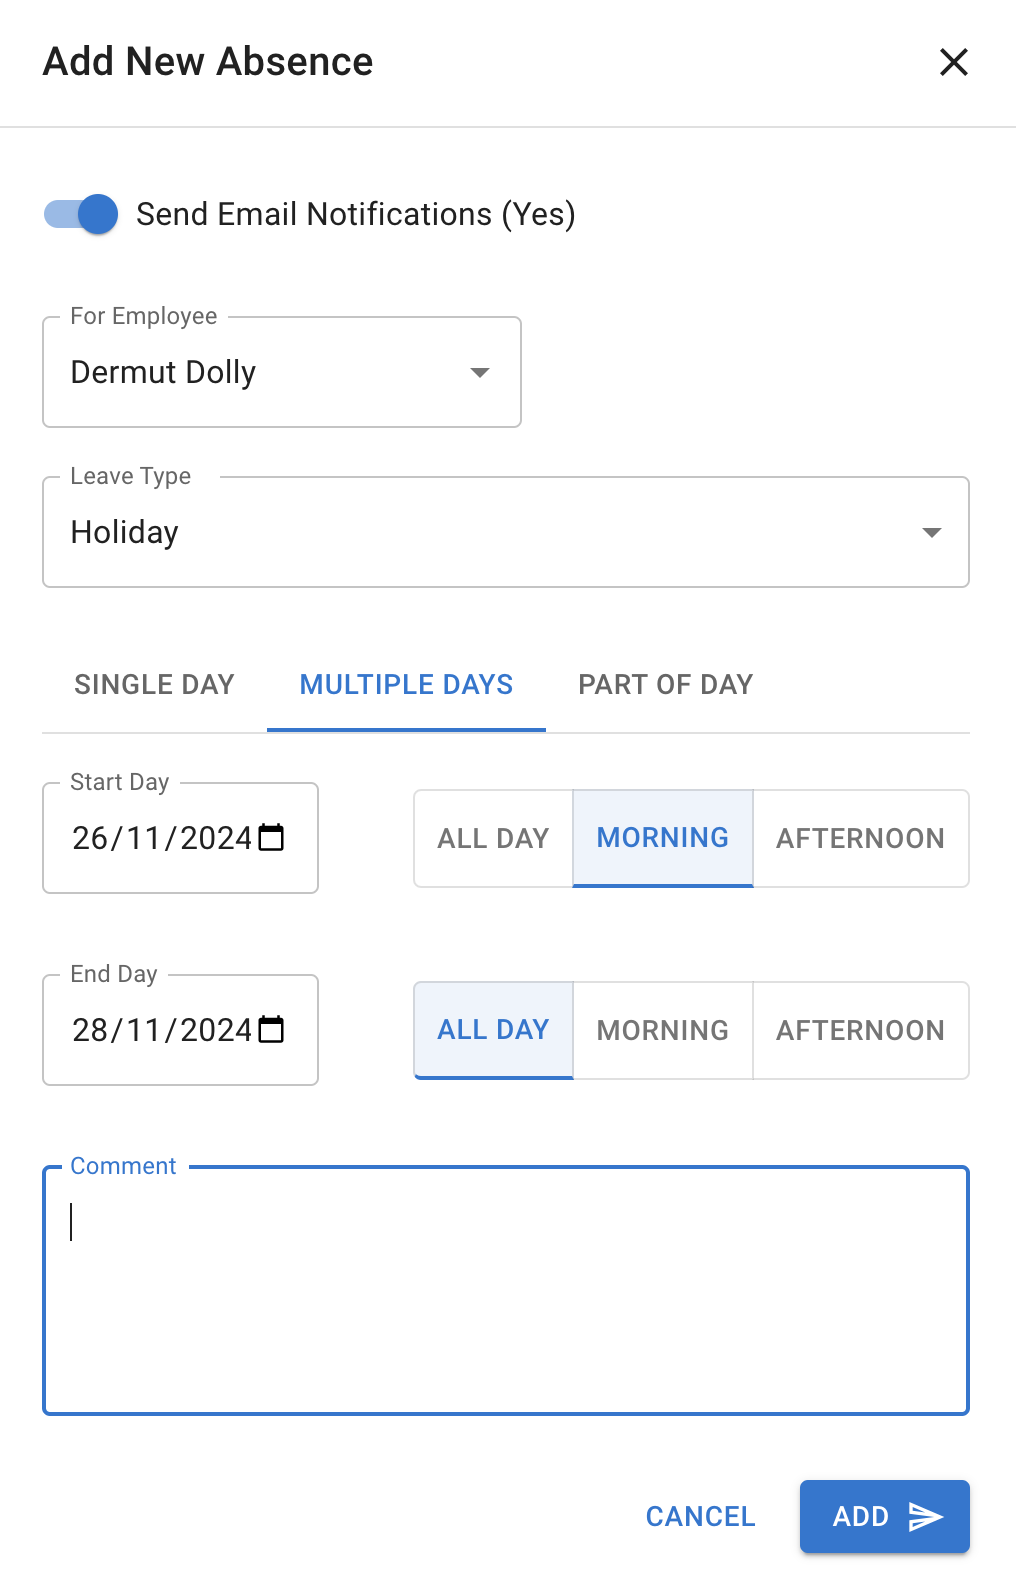
Choose the correct duration
Depending on your company settings, you may be able to book:
- one full day
- several full days
- a morning
- an afternoon
- a half day
- a selected number of hours
Check the employee’s work schedule or rota before submitting the request.
TimeOff.Management uses the employee’s working pattern and standard day length when calculating the absence.
Read more: Allow partial leave
Send an email notification
The form includes a Send Email Notification option.
| Setting | What happens |
|---|---|
| On | The employee receives the normal email notification |
| Off | The employee does not receive an email about the booking |
Keep the notification on for most normal bookings.
You may turn it off when:
- entering historical leave
- correcting old records
- completing administrative data clean-up
- the employee has already been informed another way
Use this option carefully. Turning it off means the employee may not know that the leave was added or changed.
What happens to approval?
The request may be approved immediately or follow the normal approval process.
This depends on your company’s Auto Approval settings.
Advanced Settings can control whether requests created by:
- Admins
- Supervisors
- Secondary Supervisors
are approved automatically.
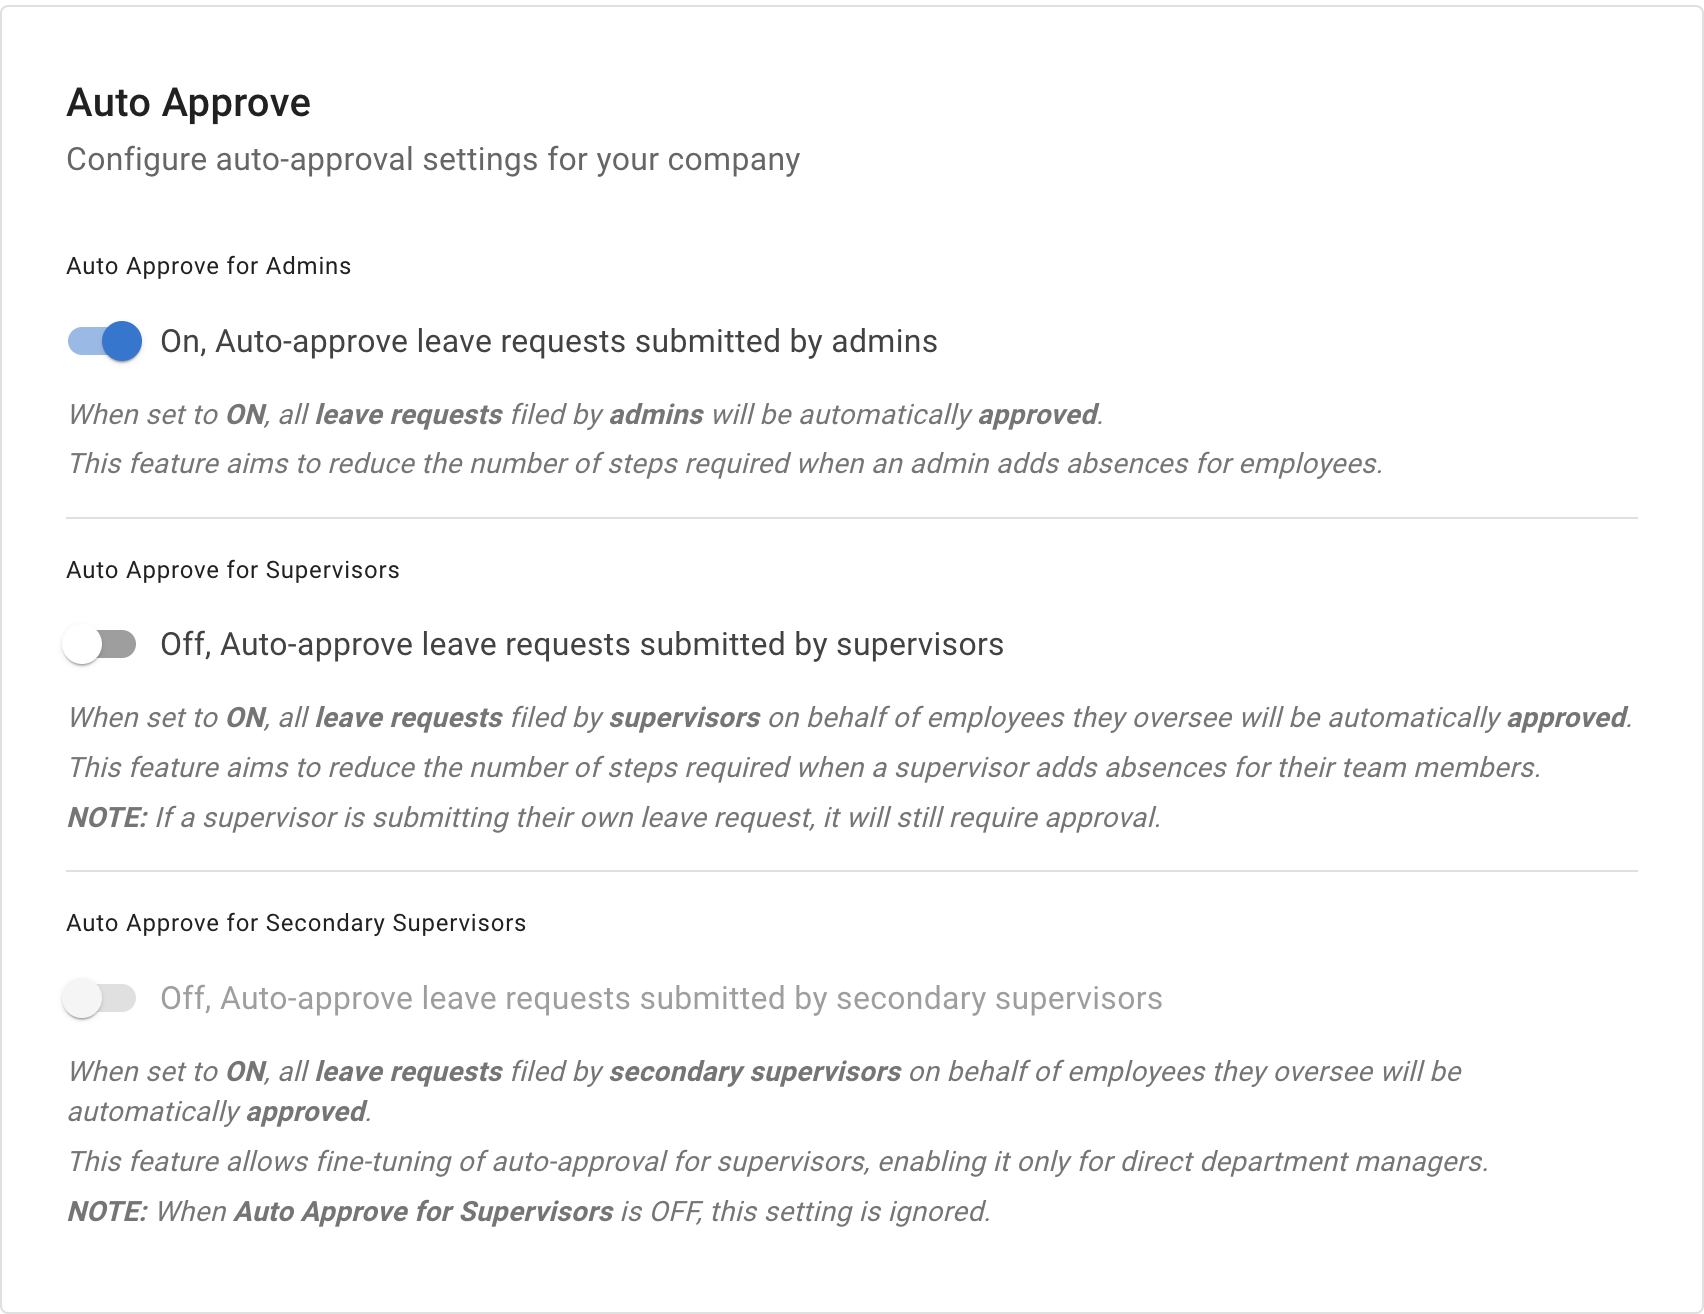
| Company setting | Likely result |
|---|---|
| Auto approval enabled | The employee leave may be approved immediately |
| Auto approval disabled | The request may follow the normal approval process |
Read more: Auto approval settings
Booking a disabled leave type
Some leave types may be closed or disabled for employee booking.
An admin can allow managers to override this restriction.
When this permission is enabled, a manager may be able to book a disabled leave type on behalf of an employee.
Disabled leave types are clearly marked in the list.
This can be useful for leave types that should only be entered by authorised managers, such as:
- an approved unpaid absence
- a special company leave type
- a sensitive absence category
- an absence that requires manager confirmation
Only use a disabled leave type when the booking follows your company’s rules.
Read more: Block selected leave types
Check the effect on allowance
The selected leave type decides whether the request:
- deducts from allowance
- adds to allowance
- has no effect on allowance
- uses its own leave type limit
Before submitting, check that the correct leave type has been selected.
Using the wrong type can affect the employee’s remaining allowance and reports.
Read more:
Add a clear comment
Add a short comment when it helps explain why the request was created.
For example:
- “Added following manager approval”
- “Employee reported sick by phone”
- “Historical leave record”
- “Corrected dates agreed with employee”
Comments help maintain a clear record for the employee, managers, and administrators.
Do not include sensitive personal information unless your company requires it.
Check the request after saving
After submitting the request, check:
- the correct employee was selected
- the leave type is correct
- the dates and duration are correct
- the approval status is correct
- the allowance was updated as expected
- the employee notification setting was correct
The leave should appear in the employee calendar and Team View according to its status and company privacy settings.
Edit or cancel the request
Authorised managers and admins may be able to edit or cancel the request later.
This may be needed when:
- the wrong date was entered
- the wrong leave type was selected
- the duration needs changing
- the employee’s plans change
- the request should be removed
Add a short comment when changing an employee’s leave record.
Read more: Cancel or revoke leave requests
Create employee leave on mobile
Managers and admins can also add employee leave from a mobile browser where their permissions allow it.
Read more: Using TimeOff on mobile
Related articles
-
Auto approval settings Decide whether leave created by admins and supervisors is approved automatically.
-
Approve or decline time off requests Review pending requests and understand the manager approval process.
-
Block selected leave types Restrict leave types and control whether authorised managers can override the restriction.
Best practice
Check the employee, leave type, dates, duration, notification option, and approval status before submitting.
Add a short comment when the employee did not create the request themselves.