New manager guide
Welcome to TimeOff.Management.
This guide helps managers and supervisors understand the main tools they may use day to day.
Depending on your company settings, you may be able to:
- view Team View
- check who is off
- approve or decline leave requests
- add leave on behalf of employees
- edit or cancel employee leave
- view employee records
- check allowance or PTO information
- use TimeOff on mobile
- receive weekly Who is Off emails
Your access depends on your company permissions.
1. Access your TimeOff account
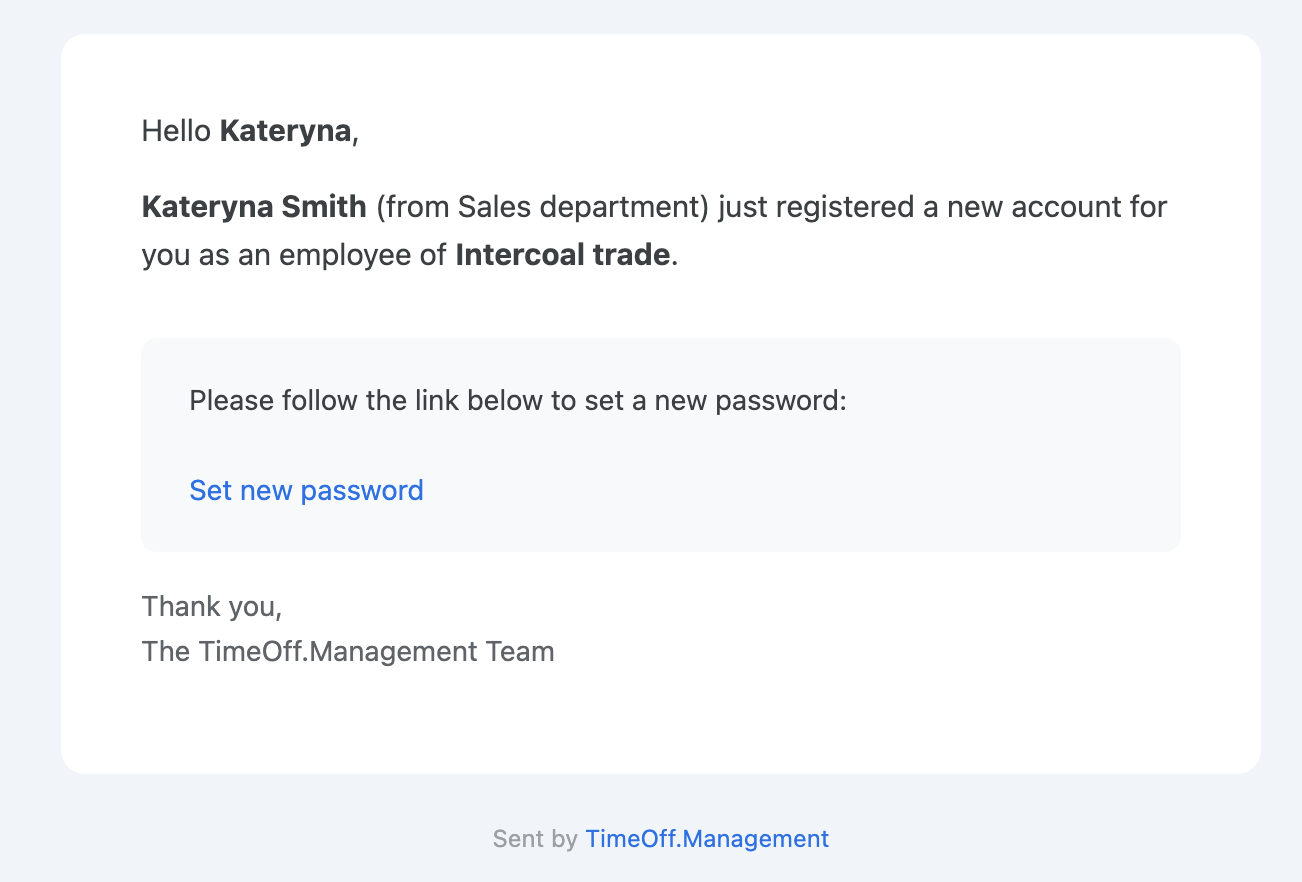
Your administrator will add you to TimeOff.Management.
You may receive a welcome email to set your password.
Your company may also use Single Sign-On, such as Google or Microsoft.
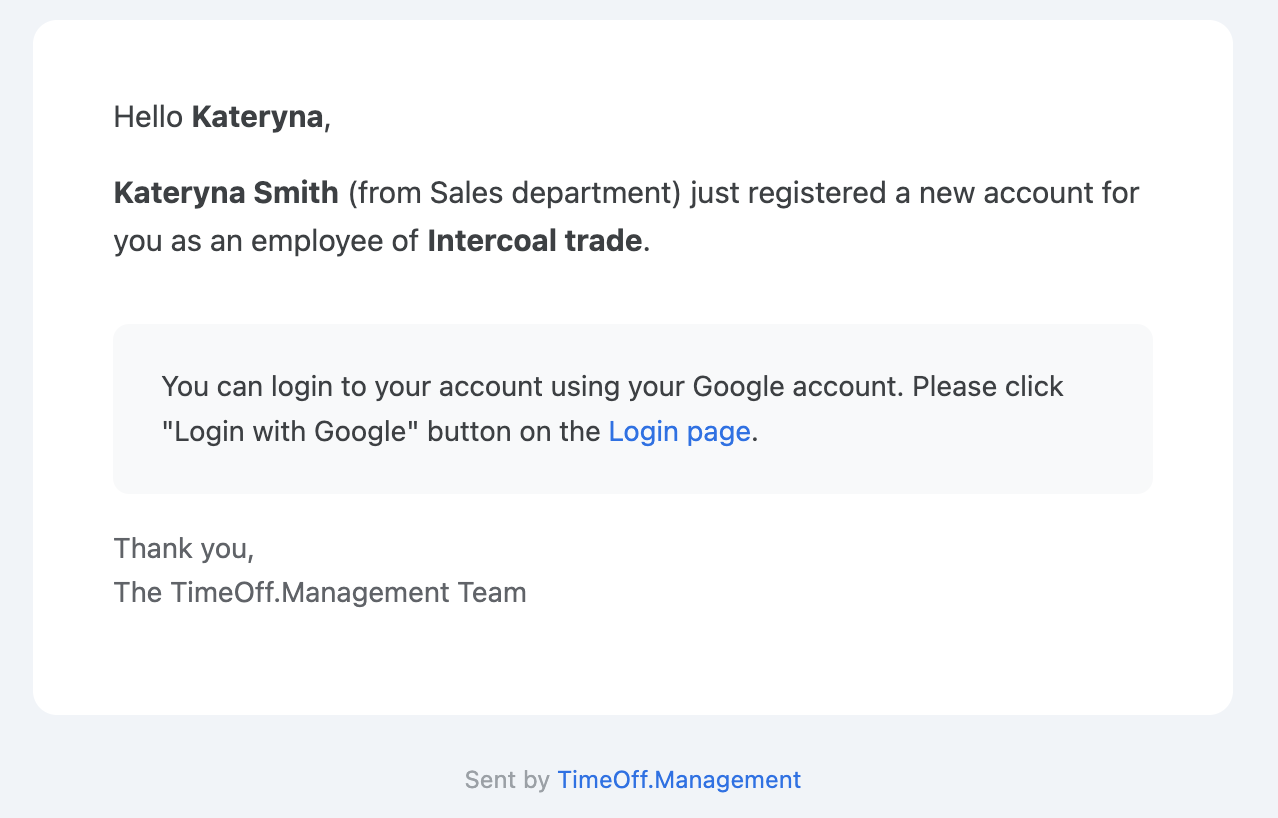
Use the login method your company has set for your account.
If you cannot log in, check with your administrator.
Read more: Reset a forgotten password
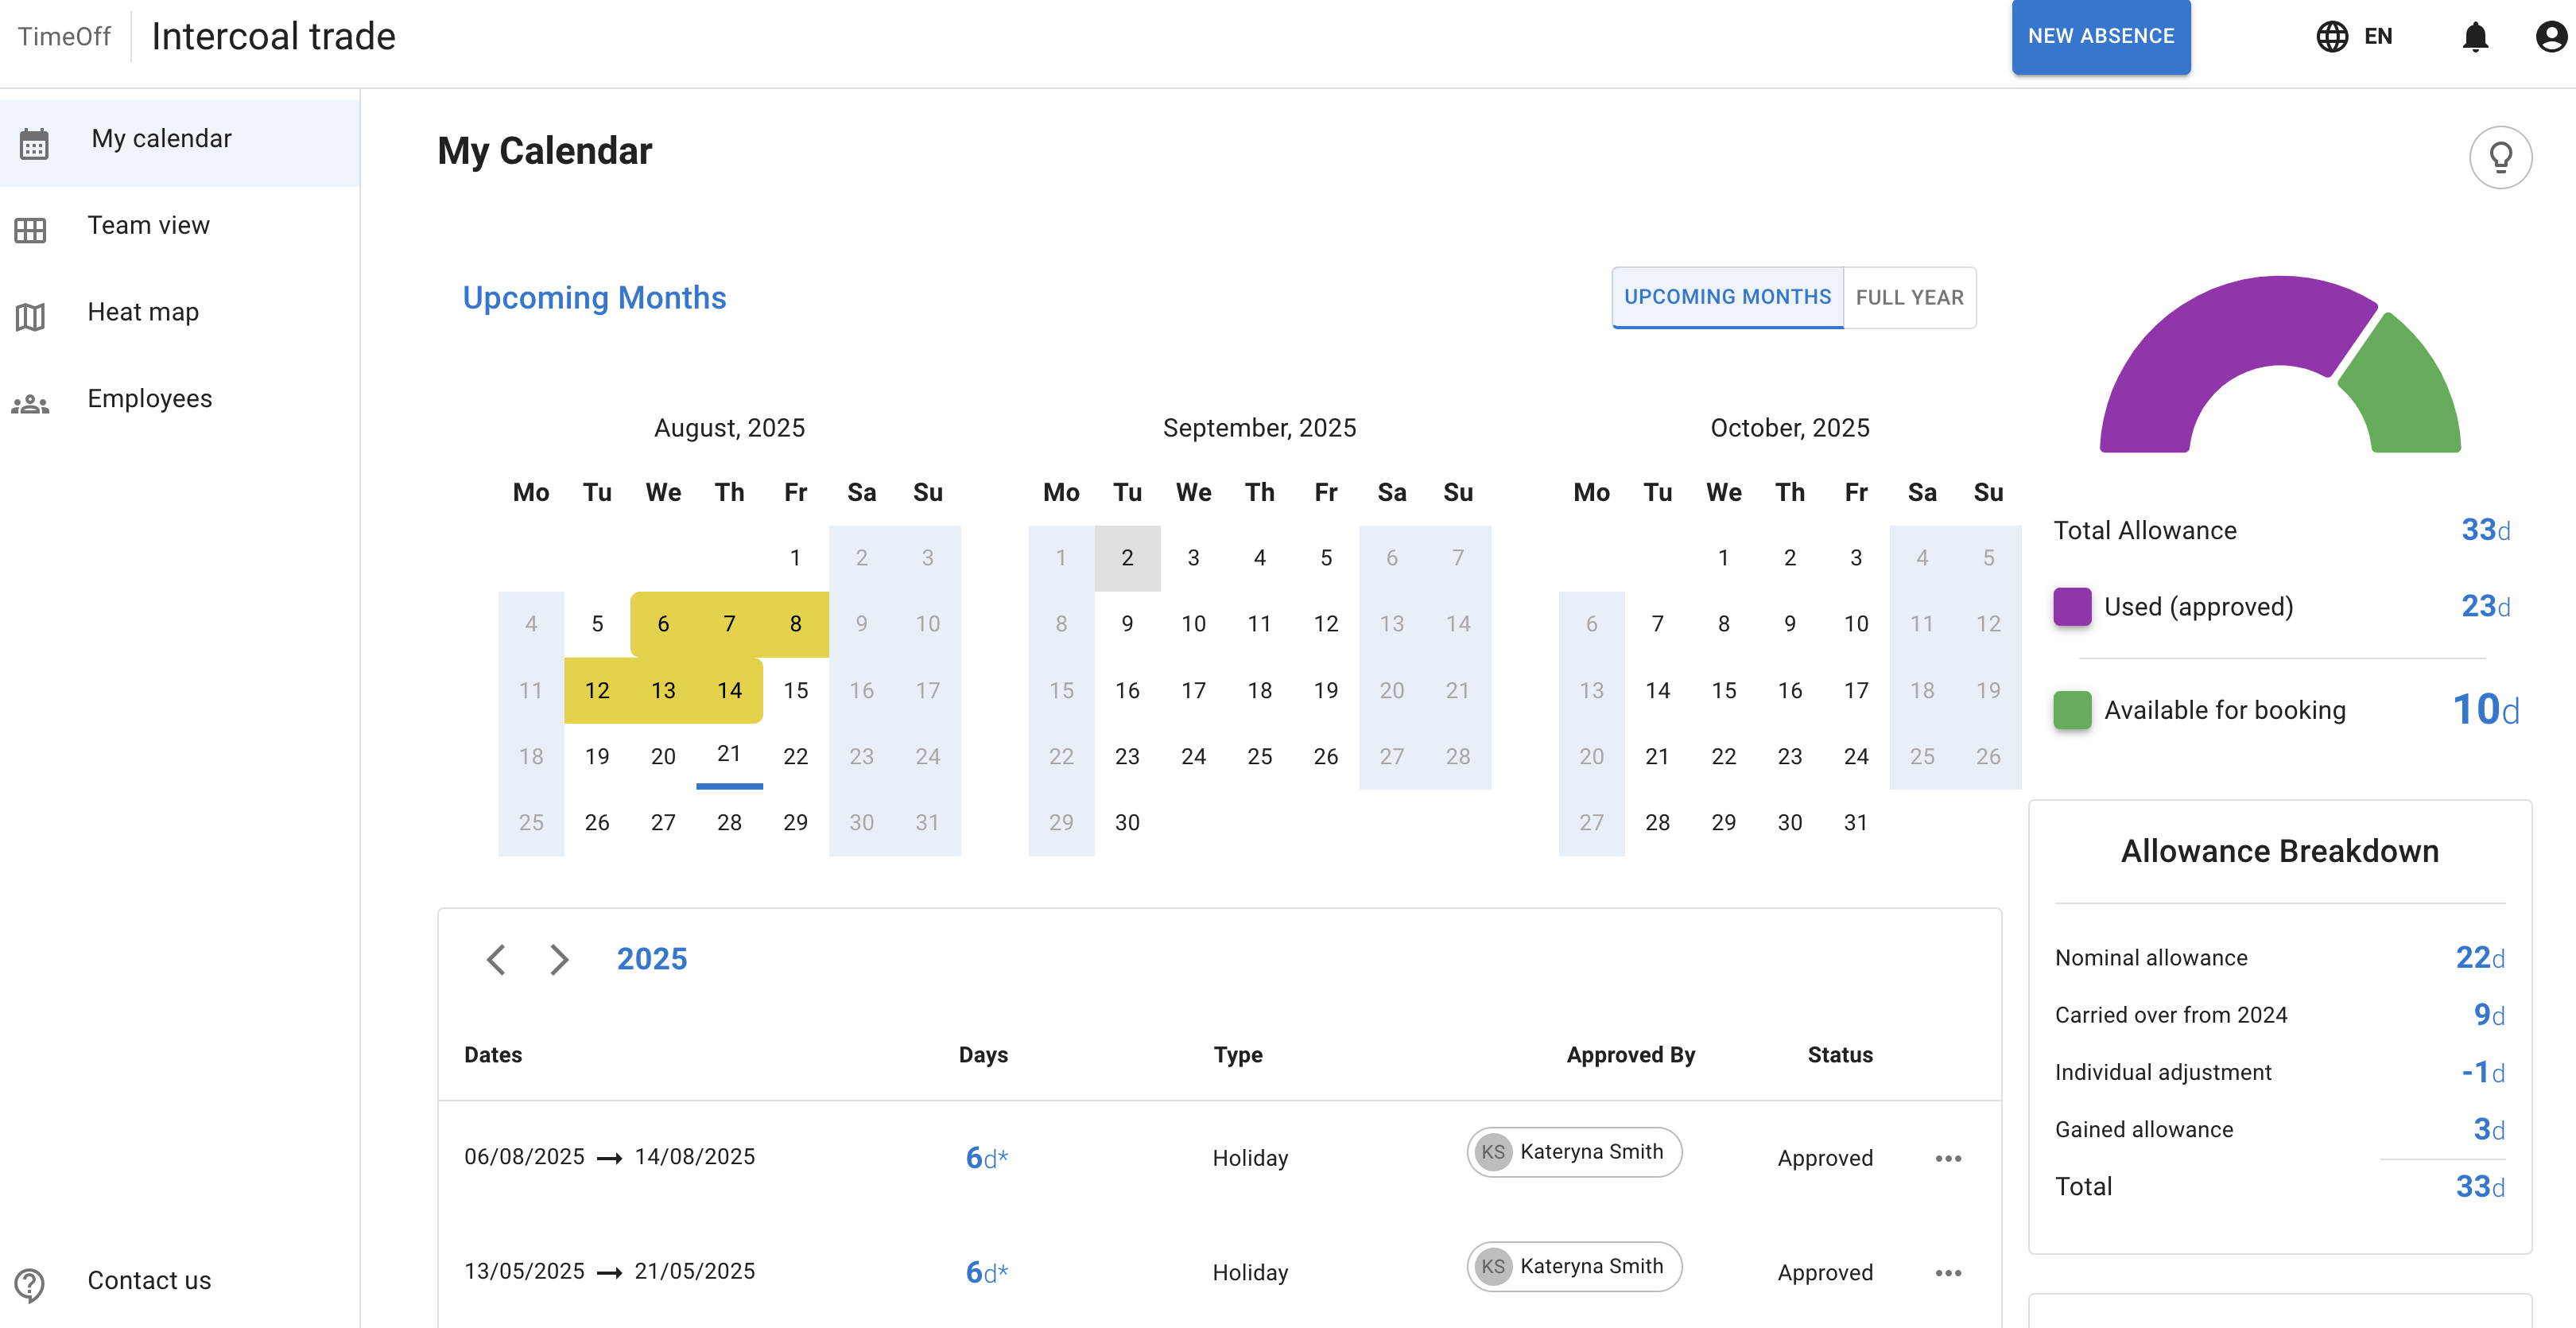
2. Use My Calendar
Managers also have their own My Calendar.
Use My Calendar to:
- view your own leave
- request time off
- check your allowance or PTO
- see public holidays
- see company events
- see blackout periods
- cancel or revoke your own leave, where allowed
Read more: My Calendar
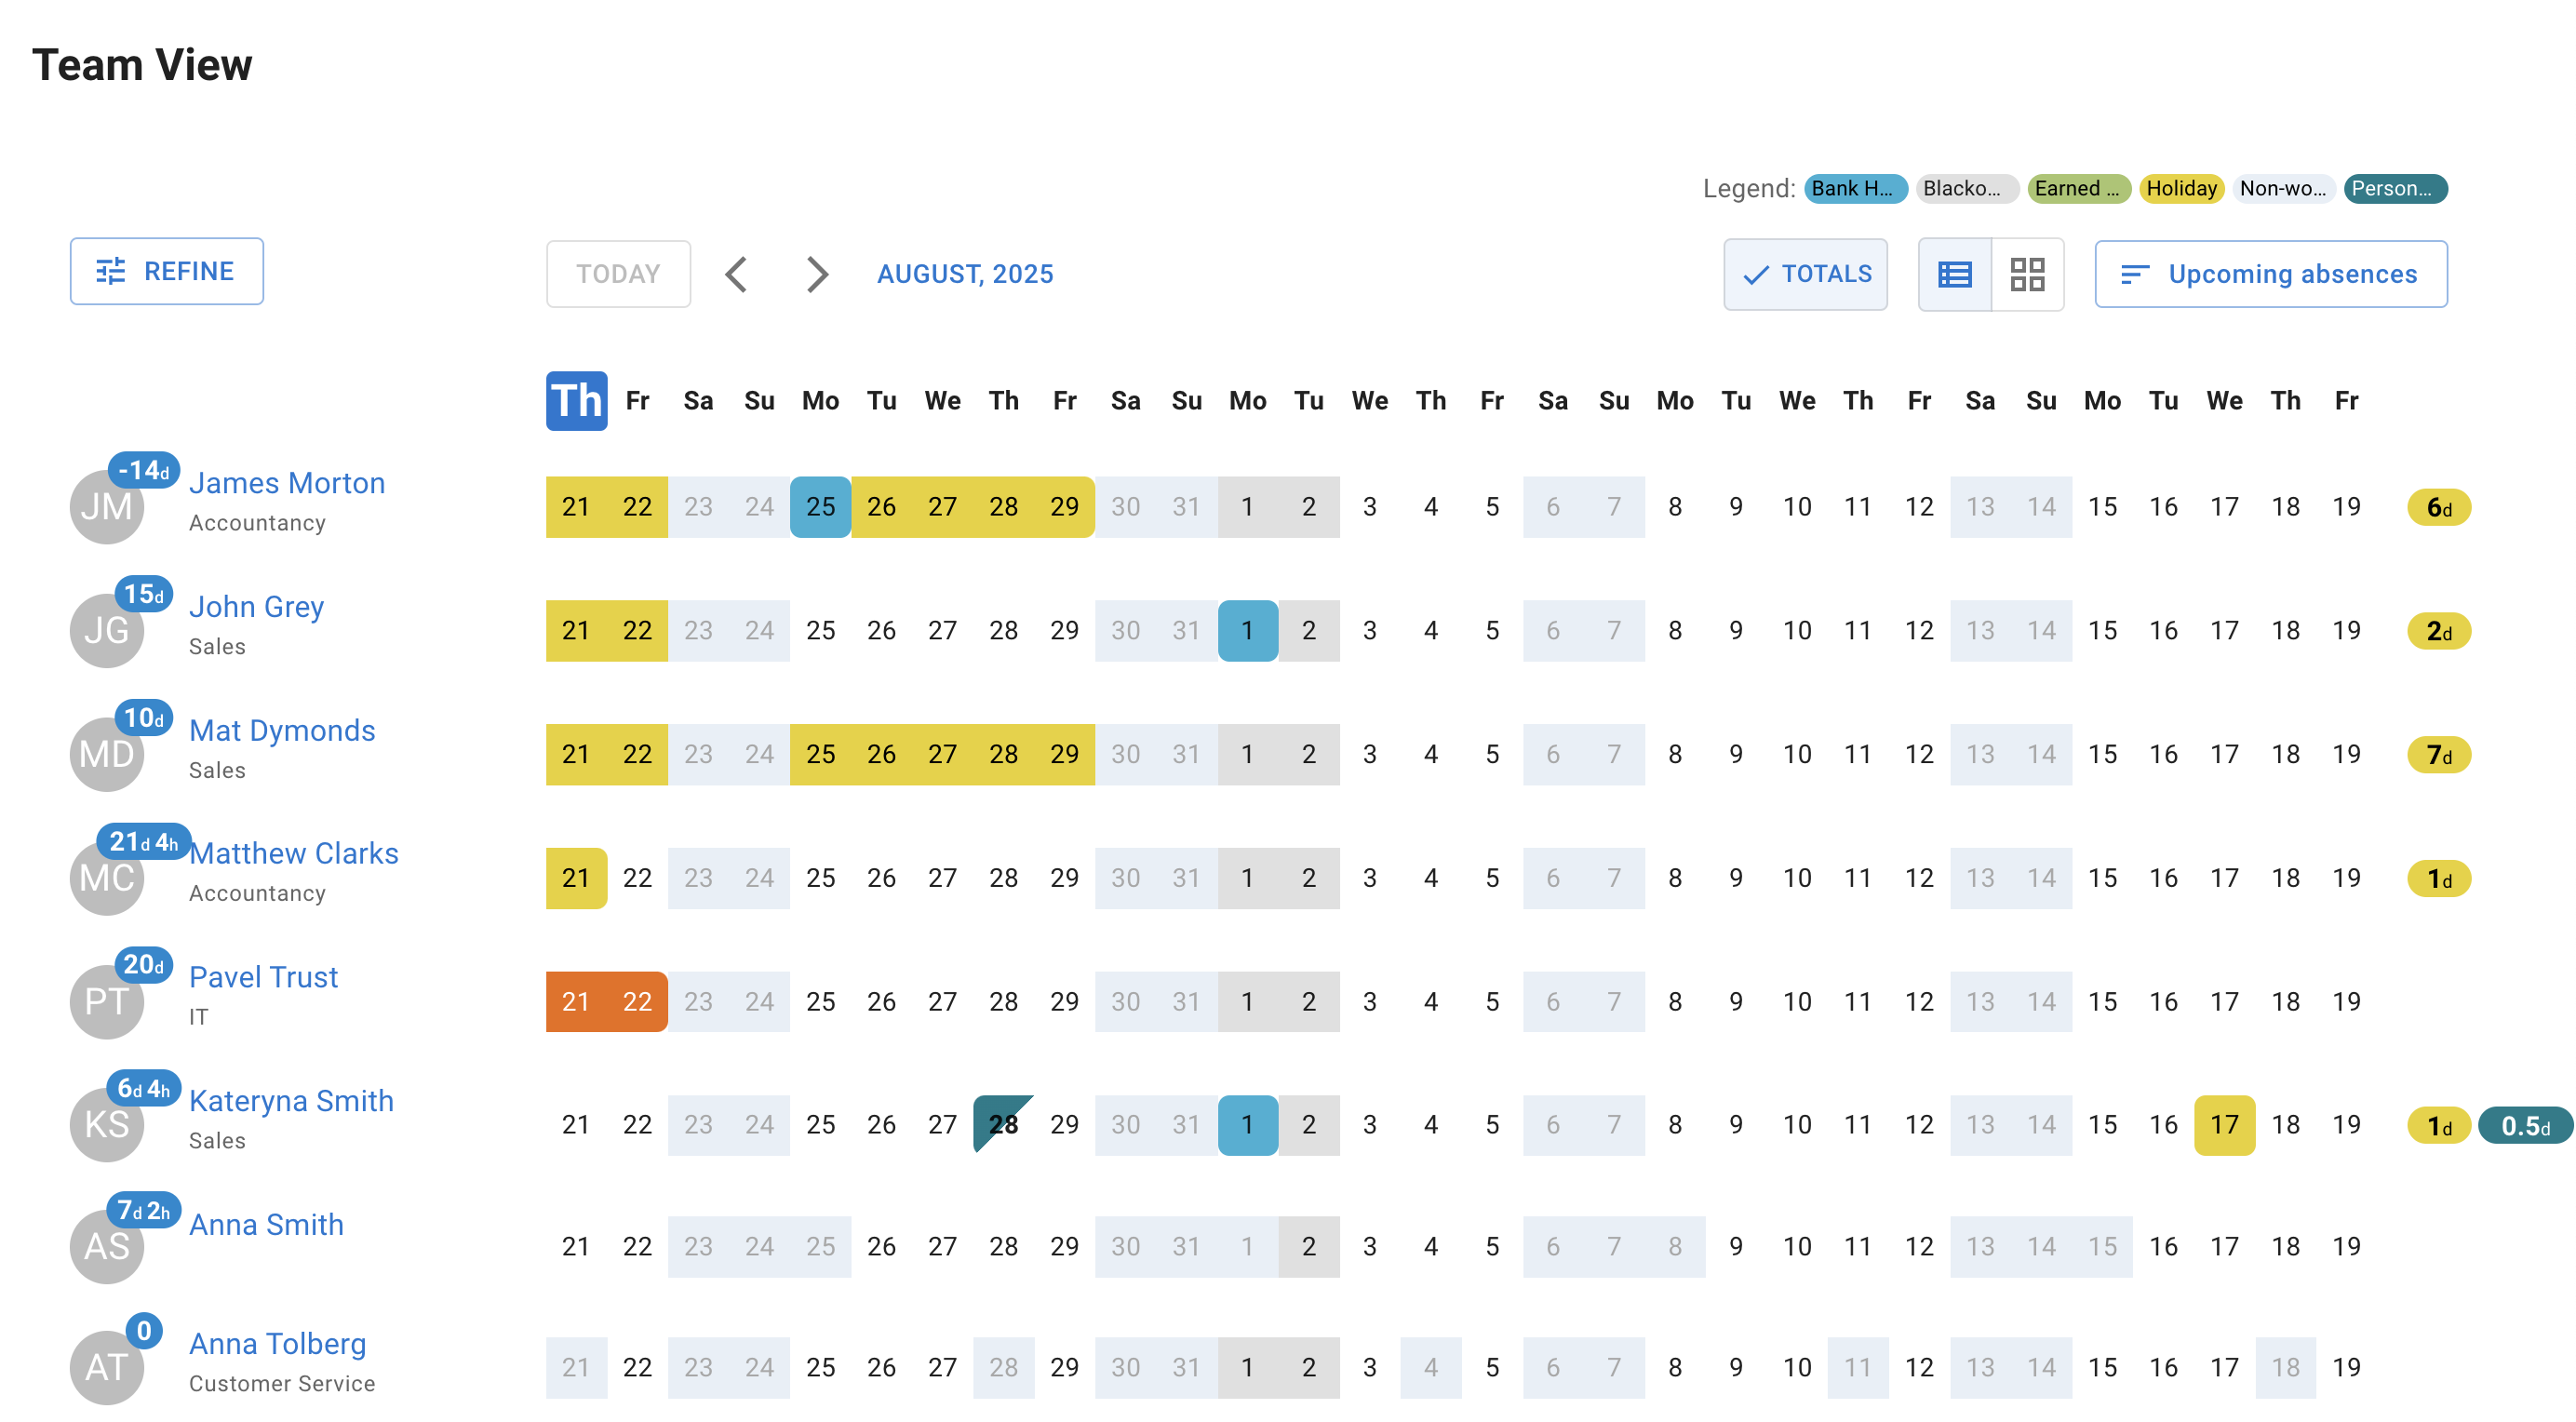
3. Use Team View
Team View helps managers see who is off.
You can use it to check:
- approved leave
- pending requests
- public holidays
- blackout periods
- company events
- overlapping leave
- who else is off on a selected date
This is useful before approving a request or planning team cover.
Read more: Using Team View
4. Understand Team View access and privacy
What you can see in Team View depends on company settings.
You may be able to see:
- only employees you manage
- employees in selected departments
- employees in selected locations
- the full company calendar, if your role allows it
Some companies hide leave type names from ordinary employees.
For example, employees may only see that someone is unavailable, without seeing whether the leave is Holiday, Sick Leave, or another leave type.
Managers and administrators may still see more detail where their permissions allow it.
Read more: Team View leave data privacy options
5. Approve or decline leave requests
When an employee submits a leave request, you may receive:
- an email notification
- an in-system notification
This is how an in-system notification can look:
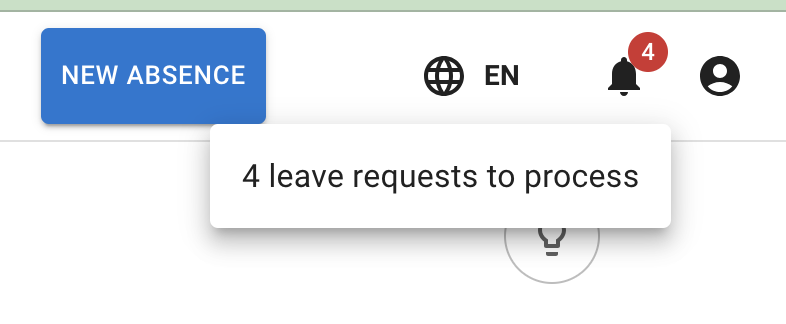
The manager may also receive an email about the employee’s request.
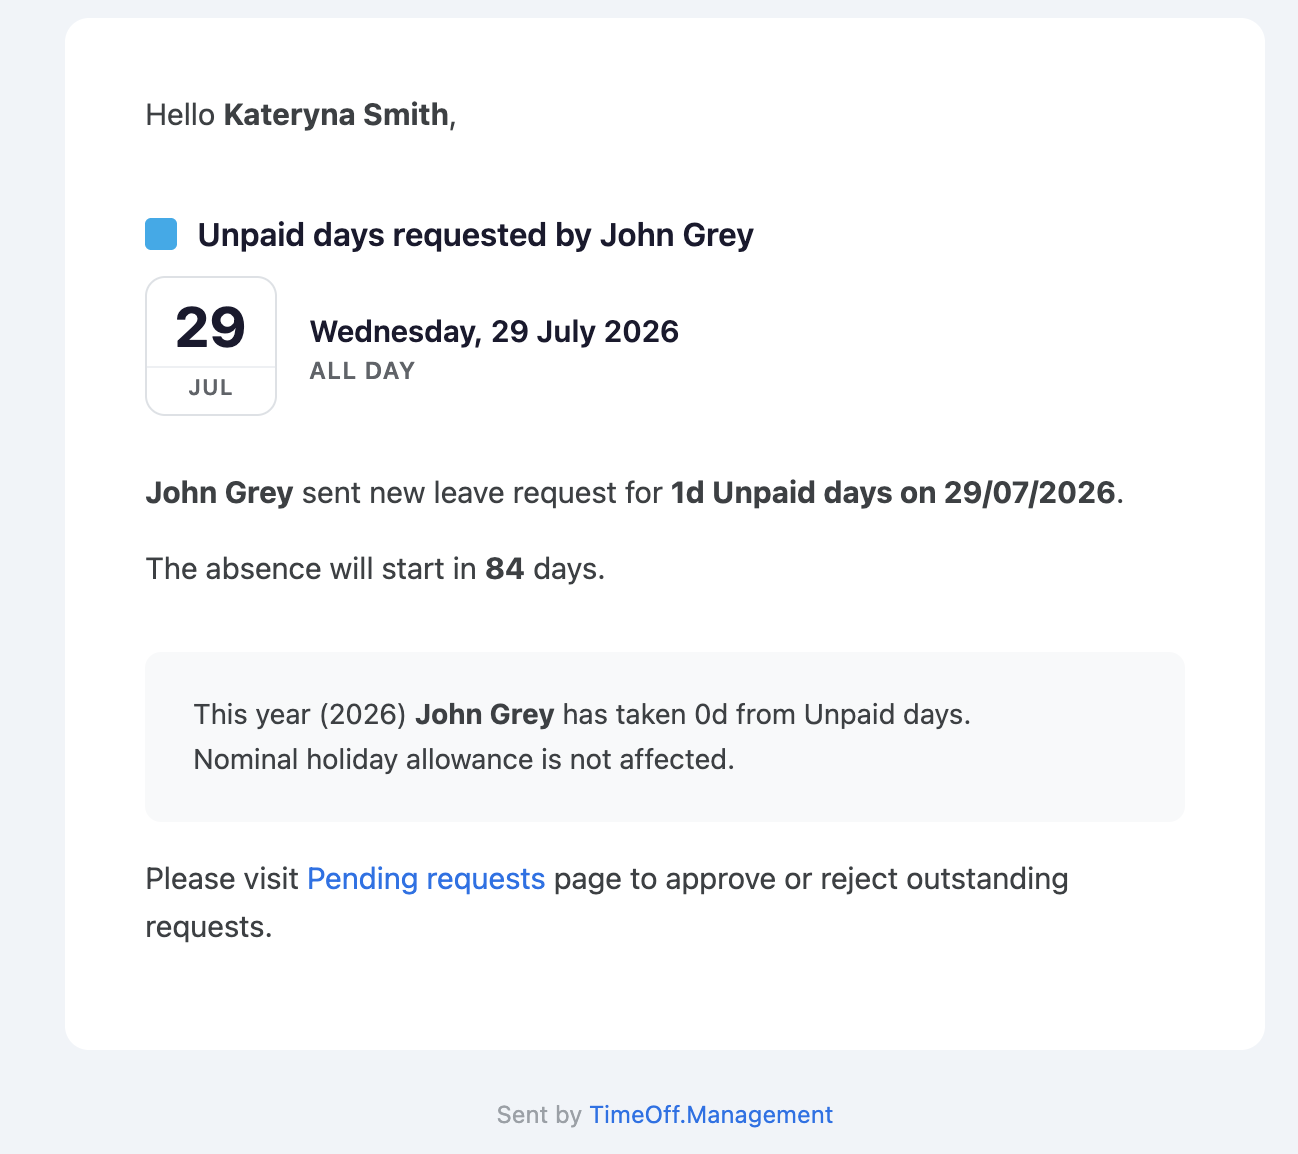
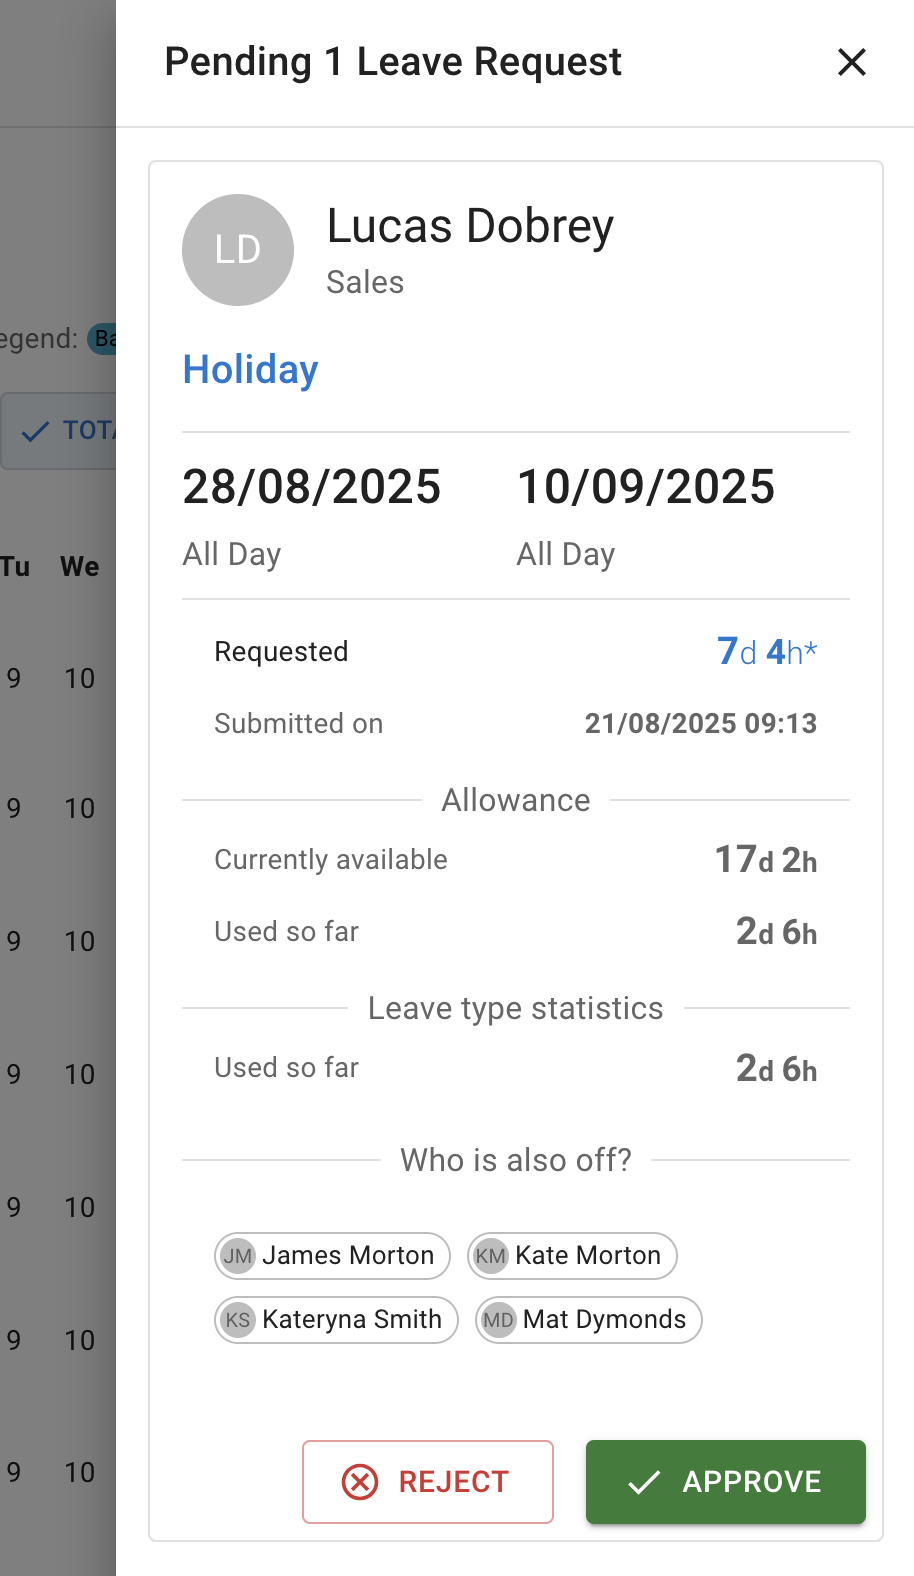
Open the request and review the details before making a decision.
Check:
- employee name
- leave type
- dates
- duration
- comments
- allowance or PTO balance, where visible
- who else is off
- blackout periods
- company events
- team cover
Then approve or decline the request.
When you open the notification, a side panel shows the pending request details.
Read more: Approve or decline time off requests
6. Add a clear comment when needed
When approving, declining, editing, or cancelling leave, add a short comment if it helps explain the decision.
Useful comments may include:
- “Approved — cover arranged”
- “Declined — too many people already off”
- “Dates corrected after discussion”
- “Added on behalf of employee”
Keep comments short and professional.
Avoid adding unnecessary sensitive personal information.
7. Add leave on behalf of an employee
Managers and supervisors may be able to create leave for employees they manage.
This is useful when:
- an employee is sick
- an employee cannot access the system
- a leave record was missed
- an agreed absence needs to be added
- historical leave needs to be entered
To add leave on behalf of an employee, use the same New Absence button used for personal time off requests.
When creating leave for an employee, check:
- the correct employee is selected
- the leave type is correct
- the dates are correct
- the duration is correct
- the email notification option is correct
- the approval status is correct
Read more: Create leave on behalf of an employee
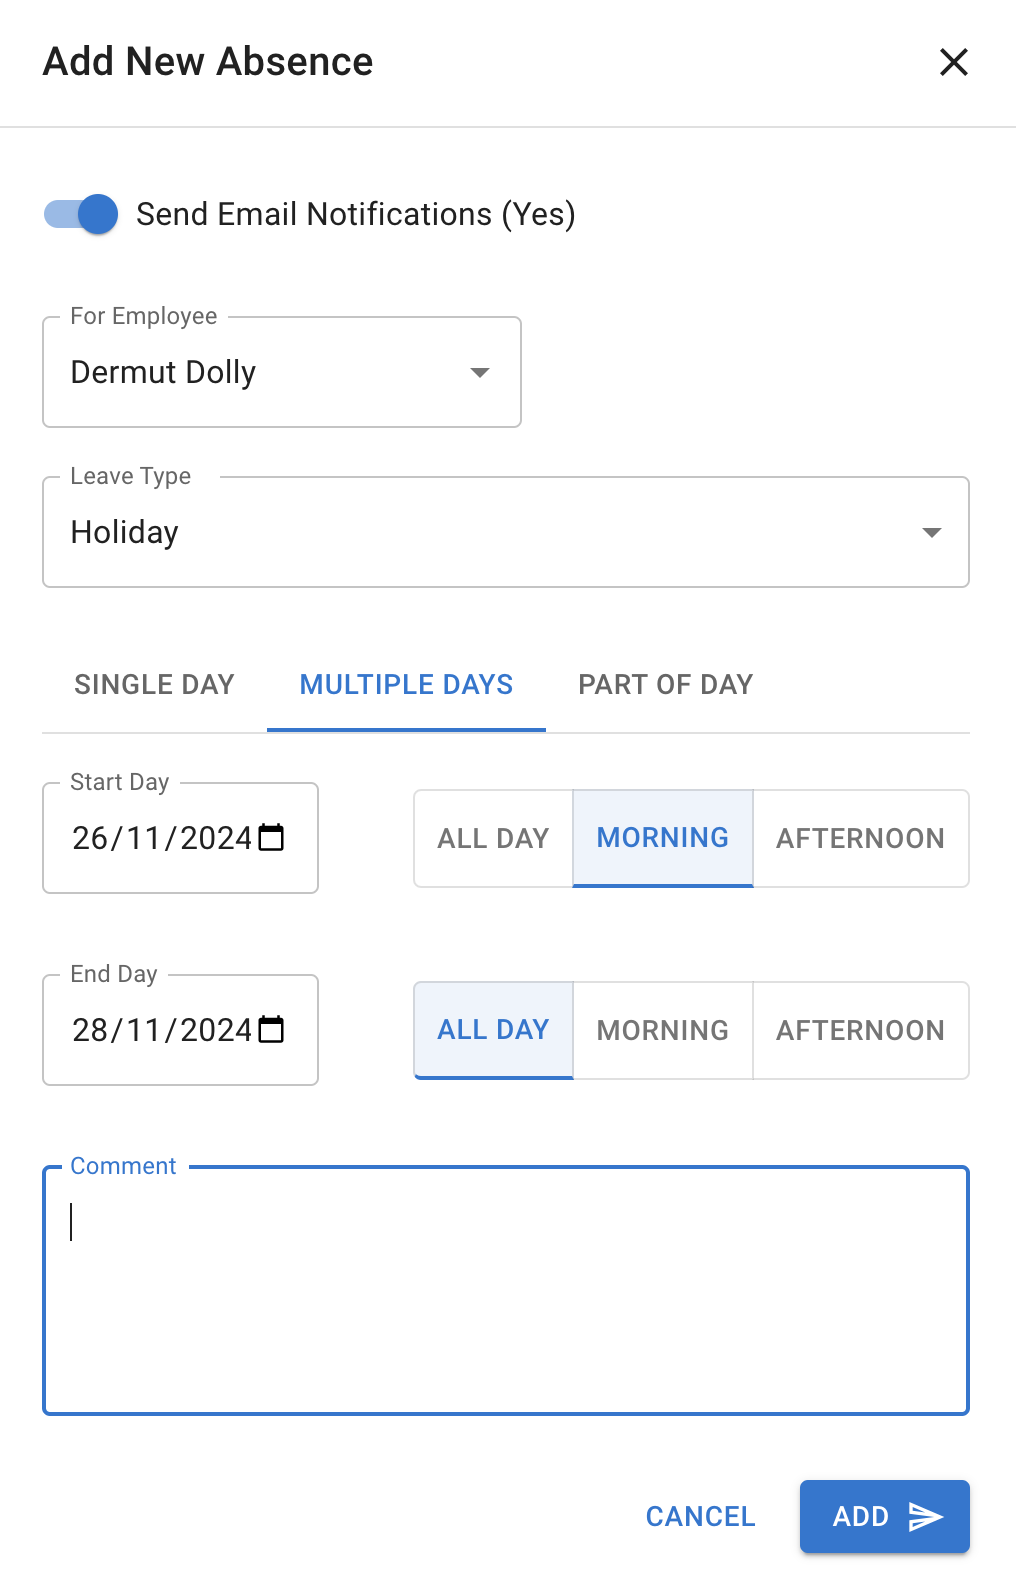
8. Add a leave request
When adding a leave request on behalf of an employee, complete the request details.
Select details
Choose:
- the employee’s name
- the leave type
- the dates
- the duration
Set email notification
Use the Send Email Notification toggle to choose whether the employee should receive an email.
- Turn it on if you want the employee to receive a notification.
- Turn it off if you are adding historical data and do not want the employee to receive an email.
Choose request type
Depending on company settings, you may be able to choose:
- single day — all day, morning, or afternoon
- multiple days — all day, morning, or afternoon
- part of a day — in hours
Morning and afternoon are each counted as half of a nominal workday.
9. Edit or cancel employee leave
Managers and administrators may be able to edit or cancel employee leave.
This can help when:
- the wrong date was entered
- the wrong leave type was selected
- the duration needs changing
- an employee’s plans change
- a request was created by mistake
To do this, click the leave request in Team View.
Depending on your permissions:
- pending leave requests can be edited and then approved
- approved leave requests can be edited or cancelled
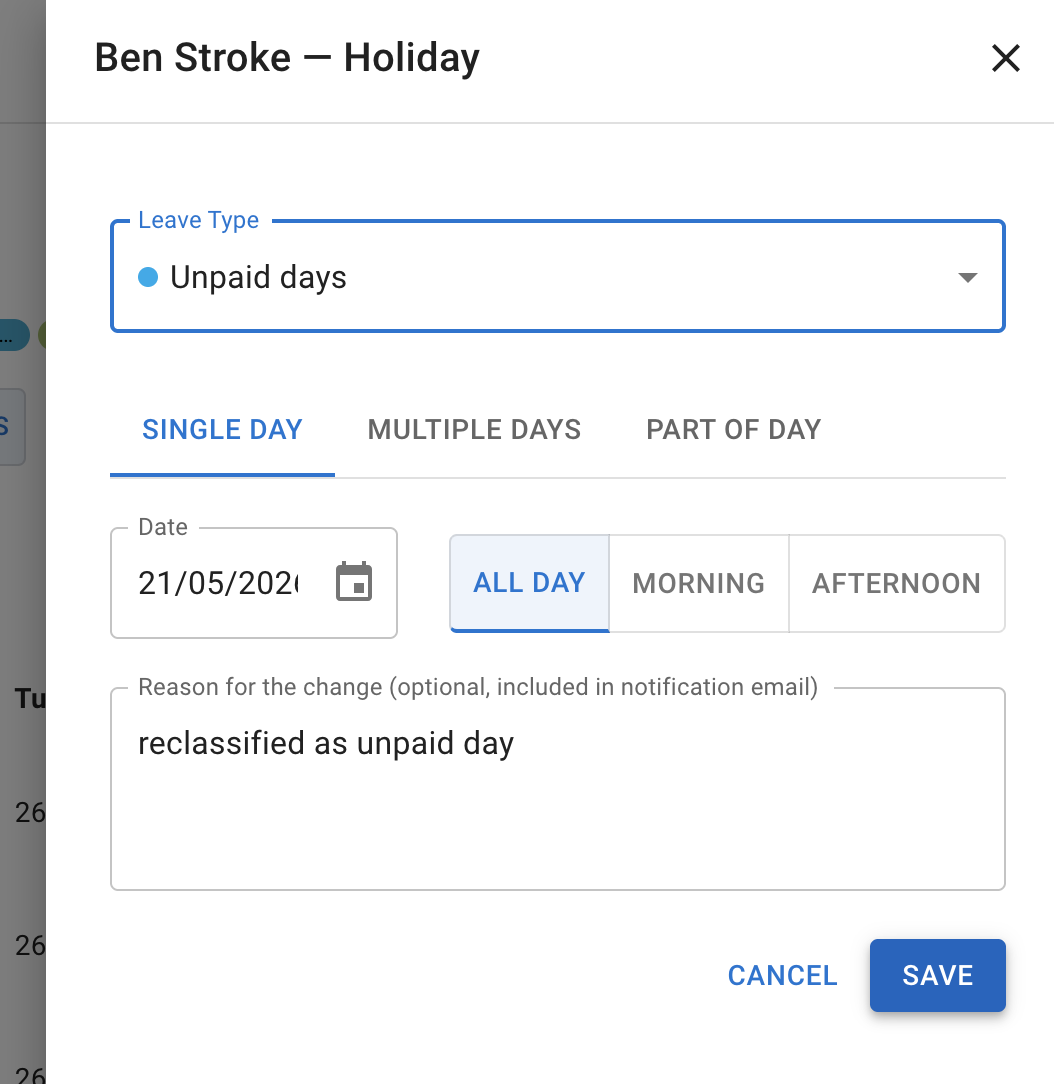
After editing or cancelling leave, check whether employee allowance or PTO has changed as expected.
Read more: Cancel or revoke leave requests
10. Use the Employees section
Depending on your permissions, you may have access to the Employees section.
This can help you check:
- employees you manage
- employee calendars
- leave records
- schedules and rotas
- remaining allowance or PTO
- past and future leave
- employee profile information
This is useful when answering common employee questions, such as:
- “How much leave do I have left?”
- “Why did this request not deduct allowance?”
- “Am I working on this date?”
- “Has my leave been approved?”
Read more: Employees section for supervisors
11. Check schedules and rotas
Schedules and rotas affect how leave is calculated.
For example, if an employee books leave on a day they do not normally work, allowance may not be deducted.
If a leave request looks wrong, check:
- the employee schedule
- the employee rota
- the selected leave type
- the standard day length
- whether the request is full day or partial day
Read more:
12. Check allowance and PTO
Managers may be able to view employee allowance or PTO information.
This can help when reviewing leave requests.
Check:
- remaining allowance
- leave already used
- pending leave
- carried-over allowance
- manual adjustments
- leave type limits
If allowance looks wrong, ask an administrator to check the employee setup.
Read more: Setting up allowances
13. Choose the correct leave type
When adding or editing leave, choose the leave type carefully.
Leave types may behave differently.
A leave type can:
- deduct from allowance
- add to allowance
- have no effect on allowance
- have its own limit
- require approval
- auto approve
- require advance notice
Using the wrong leave type can affect allowance, reports, and employee records.
Read more: Leave types
14. Use TimeOff on mobile
Managers can use TimeOff.Management from a mobile browser.
On mobile, you may be able to:
- view Team View
- approve or decline requests
- check employee leave
- add leave on behalf of employees
- edit or cancel leave, if allowed
- view your own calendar
- request your own leave
This is useful when you need to make a quick decision away from your desk.
Read more: Using TimeOff on mobile
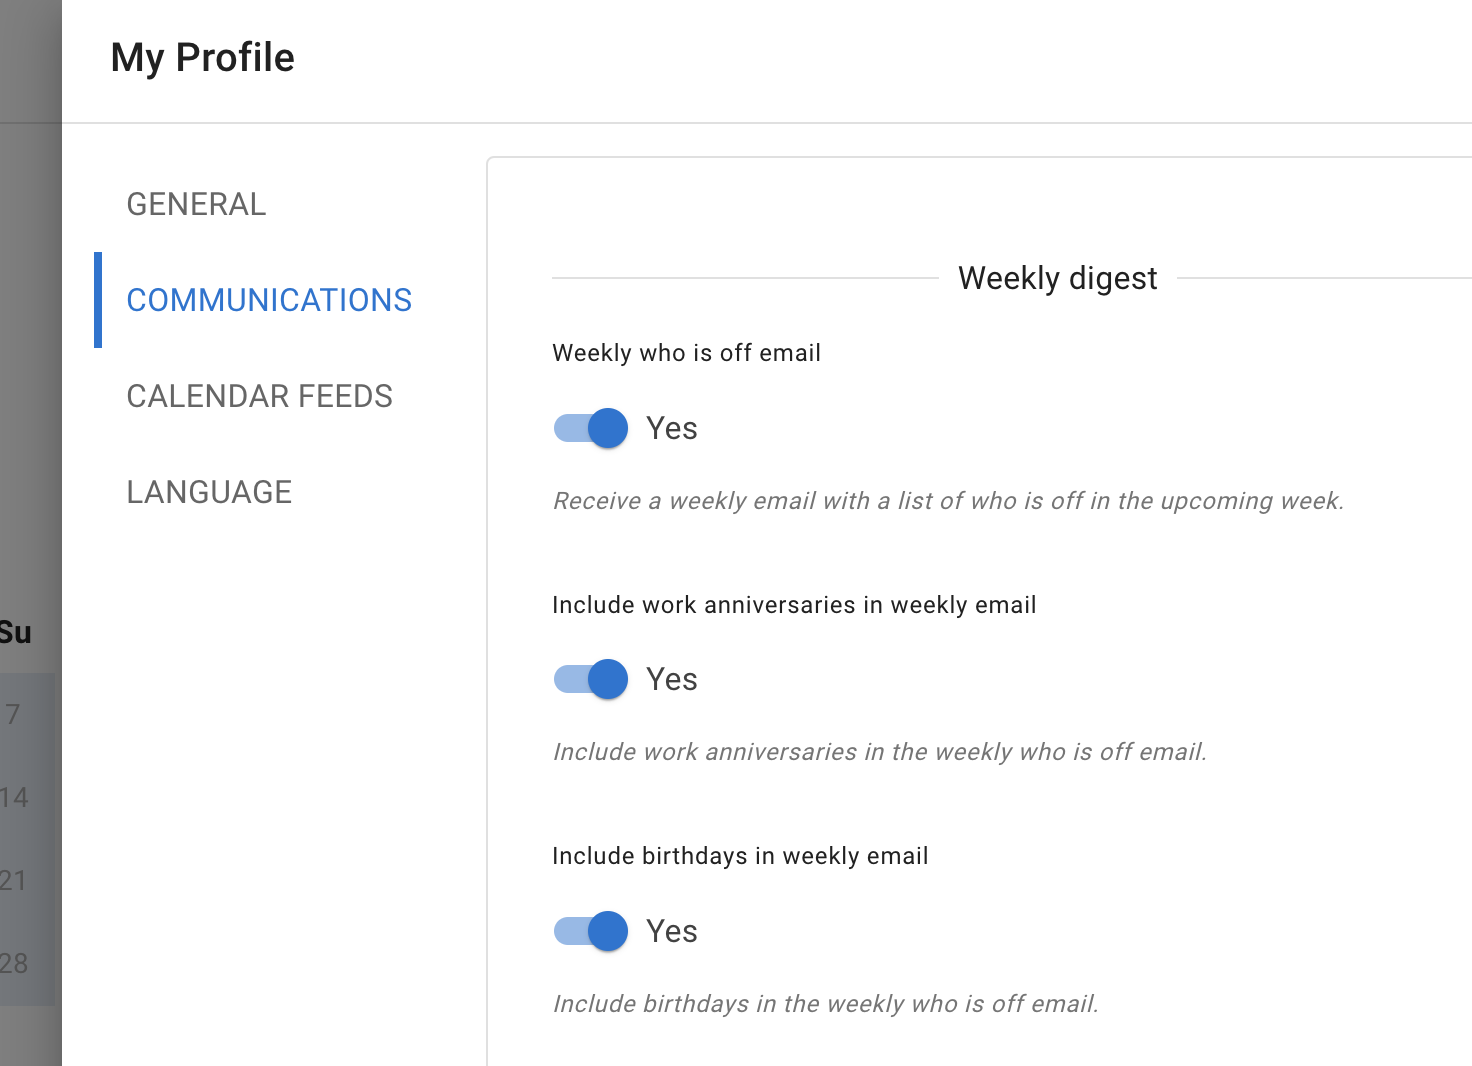
15. Weekly Who is Off emails
Managers can sign up for weekly digest emails.
Weekly digests give you a quick overview of useful team updates for the upcoming week.
The weekly digest can include:
- who is off in the upcoming week
- work anniversaries in the upcoming week
- birthdays in the upcoming week
You can turn each option on or off, depending on what you want to see in your weekly email.
To set this up:
- Log in to TimeOff.Management.
- Go to My Profile.
- Open Communications.
- Find the weekly digest settings.
- Turn on the updates you want to receive.
- Save your changes.
Read more: Manage weekly Who is Off emails
Common manager questions
I cannot see an employee
Check whether you manage that employee.
An administrator may need to review:
- department settings
- location settings
- supervisor settings
- employee visibility settings
- Team View privacy settings
Read more: Employees section for supervisors
I did not receive a leave request
Ask an administrator to check:
- who approves leave for the employee
- whether you are assigned as the approver
- whether a direct supervisor is set
- whether the request was auto-approved
- whether another approver already actioned it
Read more: How to assign and manage leave approvers
I cannot approve a request
You may not have the required permission.
Check with an administrator if you believe you should be able to approve leave for that employee.
I cannot see leave type details
Your company may hide leave type details in Team View for privacy.
Managers may still see more information depending on company settings.
Read more: Team View leave data privacy options
The allowance looks wrong
Ask an administrator to check:
- employee allowance setup
- schedule or rota
- leave type settings
- manual adjustments
- carry over
- leave type limits
Read more: Why isn’t leave being deducted from the allowance?
Related articles
-
Using Team View Check team availability, pending leave, departments, locations, and overlapping absences.
-
Approve or decline time off requests Review employee requests and make approval decisions.
-
Employees section for supervisors View employee records, calendars, allowance, schedules, and leave history.
-
Using TimeOff on mobile Manage leave and approvals from a mobile browser.
Best practice
Check Team View before approving leave.
Use clear comments when changing or declining requests, and ask an administrator to review employee setup if allowance, schedule, or visibility does not look right.