
Import employees from a spreadsheet
To add many employees at once, paste the rows from your spreadsheet or choose a CSV file. The import matches your columns, checks every row, and adds the employees whose rows are ready.
It takes three steps:
- Paste your rows, or choose a CSV file.
- Match your columns.
- Check the rows in a table, where every row is checked before anything is added, then add the employees.
As the page itself says: “Nobody is added until you press Add.”
Before you start
Who can import employees
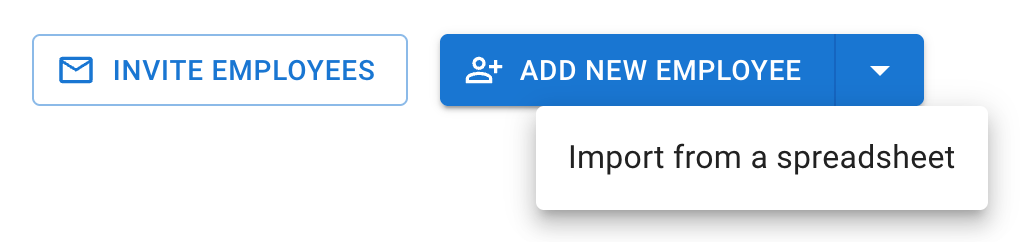
Only administrators can import employees, and only they see the arrow beside Add new employee on Employees. The arrow opens a menu with Import from a spreadsheet, which opens the Import employees page.
What each row needs
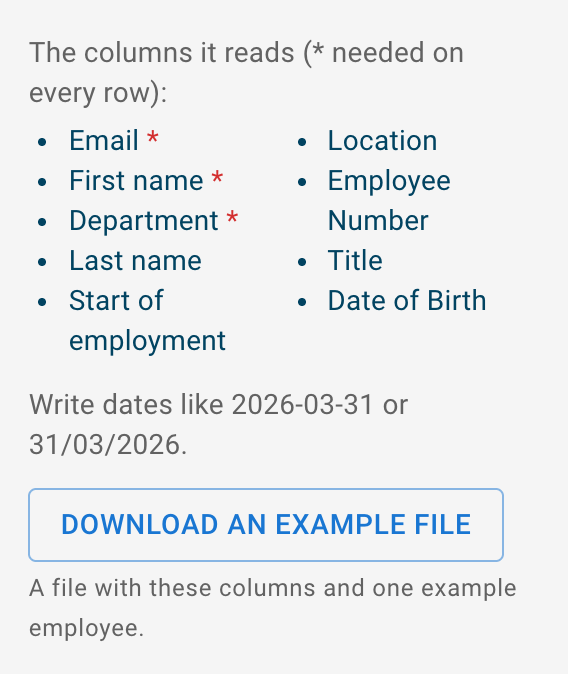
Each row of your spreadsheet is one employee. The import reads nine columns, and three of them are needed on every row: Email, First name and Department.
The others are Last name, Start of employment, Location, Employee Number, Title and Date of Birth.
The card on the first step lists them too, in your own language, with the needed ones marked.
Step 1: paste your rows or choose a CSV file
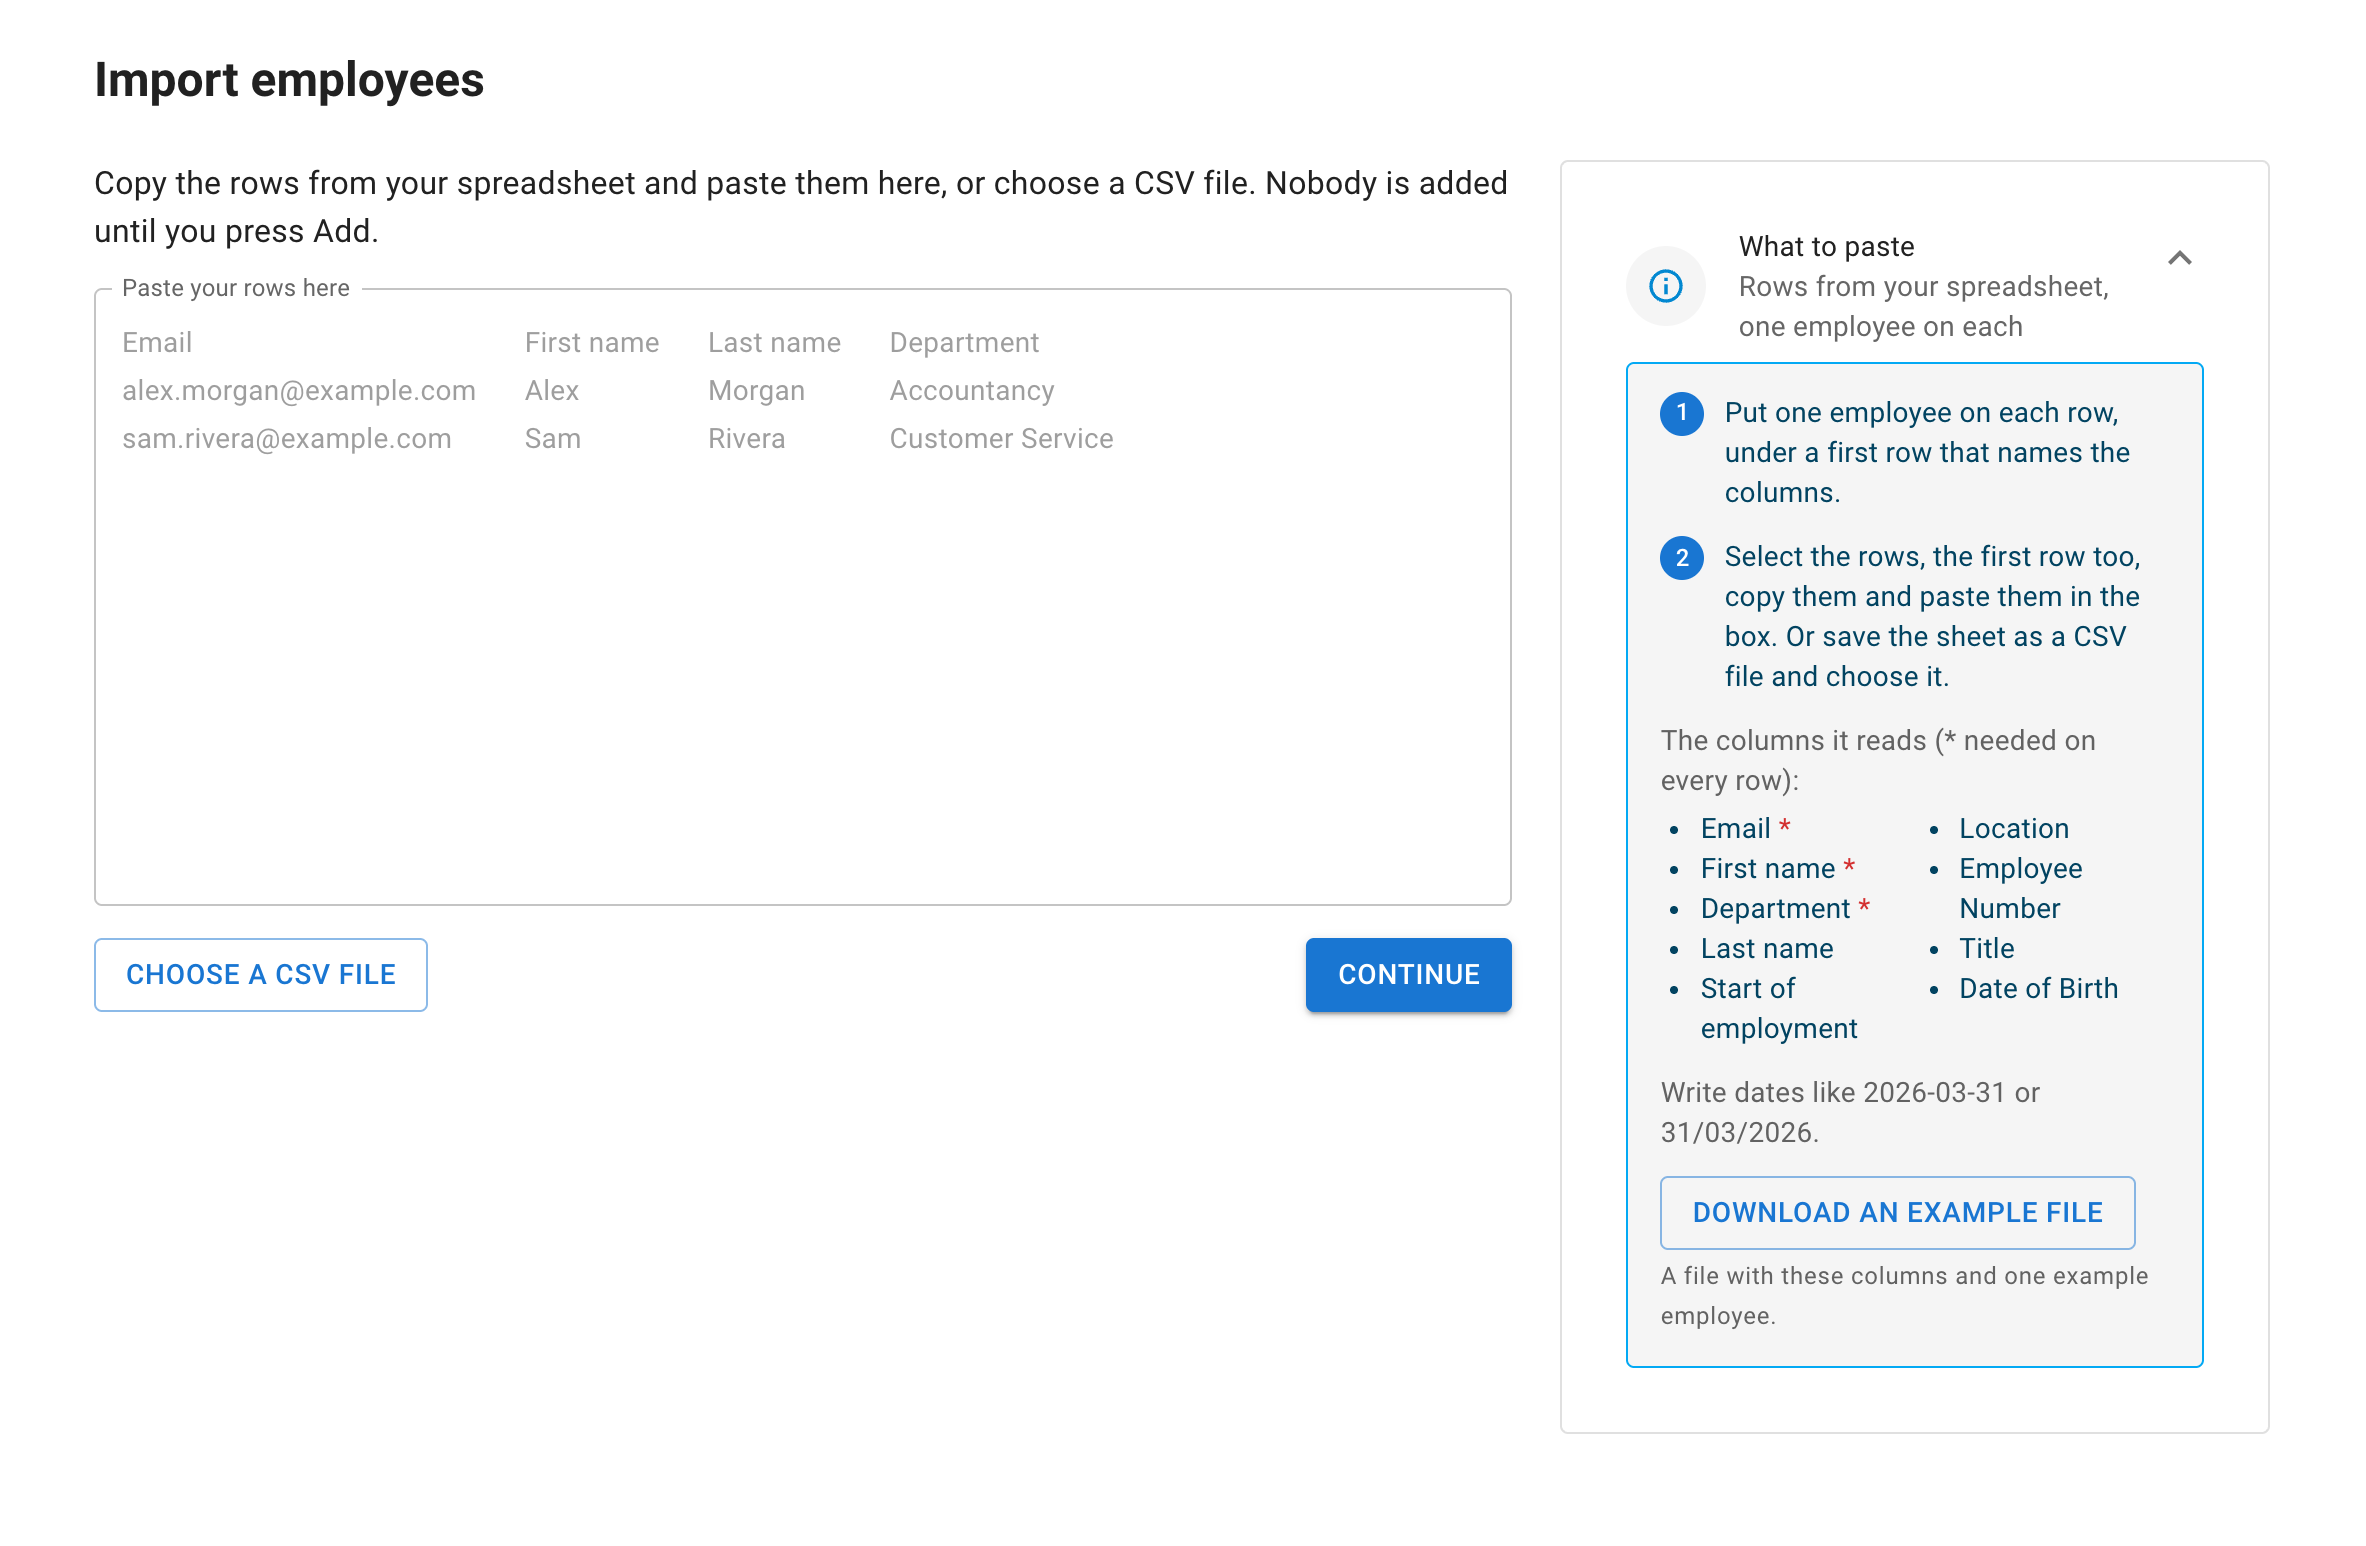
Copy the rows from your spreadsheet and paste them into the box Paste your rows here: rows copied straight from any spreadsheet will do. Or select Choose a CSV file, under the box. Then select Continue.
While the box is empty, it shows two example rows. They go as soon as the box holds anything.
The What to paste card
The What to paste card sits beside the box on a wide screen, and above it on a narrow one. It holds:
- two numbered steps
- the columns the import reads, with the needed ones marked
- how to write dates (see Dates)
- Download an example file
The card is open at first. You can fold it away, and it stays folded in that browser.
What the page does not read
- An Excel workbook. The page asks you to copy the rows or save the sheet as CSV: “This is an Excel workbook. Open it, copy the rows and paste them here, or save it as CSV.”
- A CSV file in another encoding. The page asks you to save it as “CSV UTF-8”: “This file is not saved as UTF-8. Save it as “CSV UTF-8”, or copy the rows and paste them here.”
- A file or a sheet that is too large. The page says so, and asks you to split it.
The example file
Download an example file saves a CSV file. Its first row holds the import’s column names in your language, and the row after it an invented example employee.
To use it, replace the example with your own rows. Then copy them and paste them into the box, or save the file as CSV UTF-8 and choose it.

Step 2: match your columns
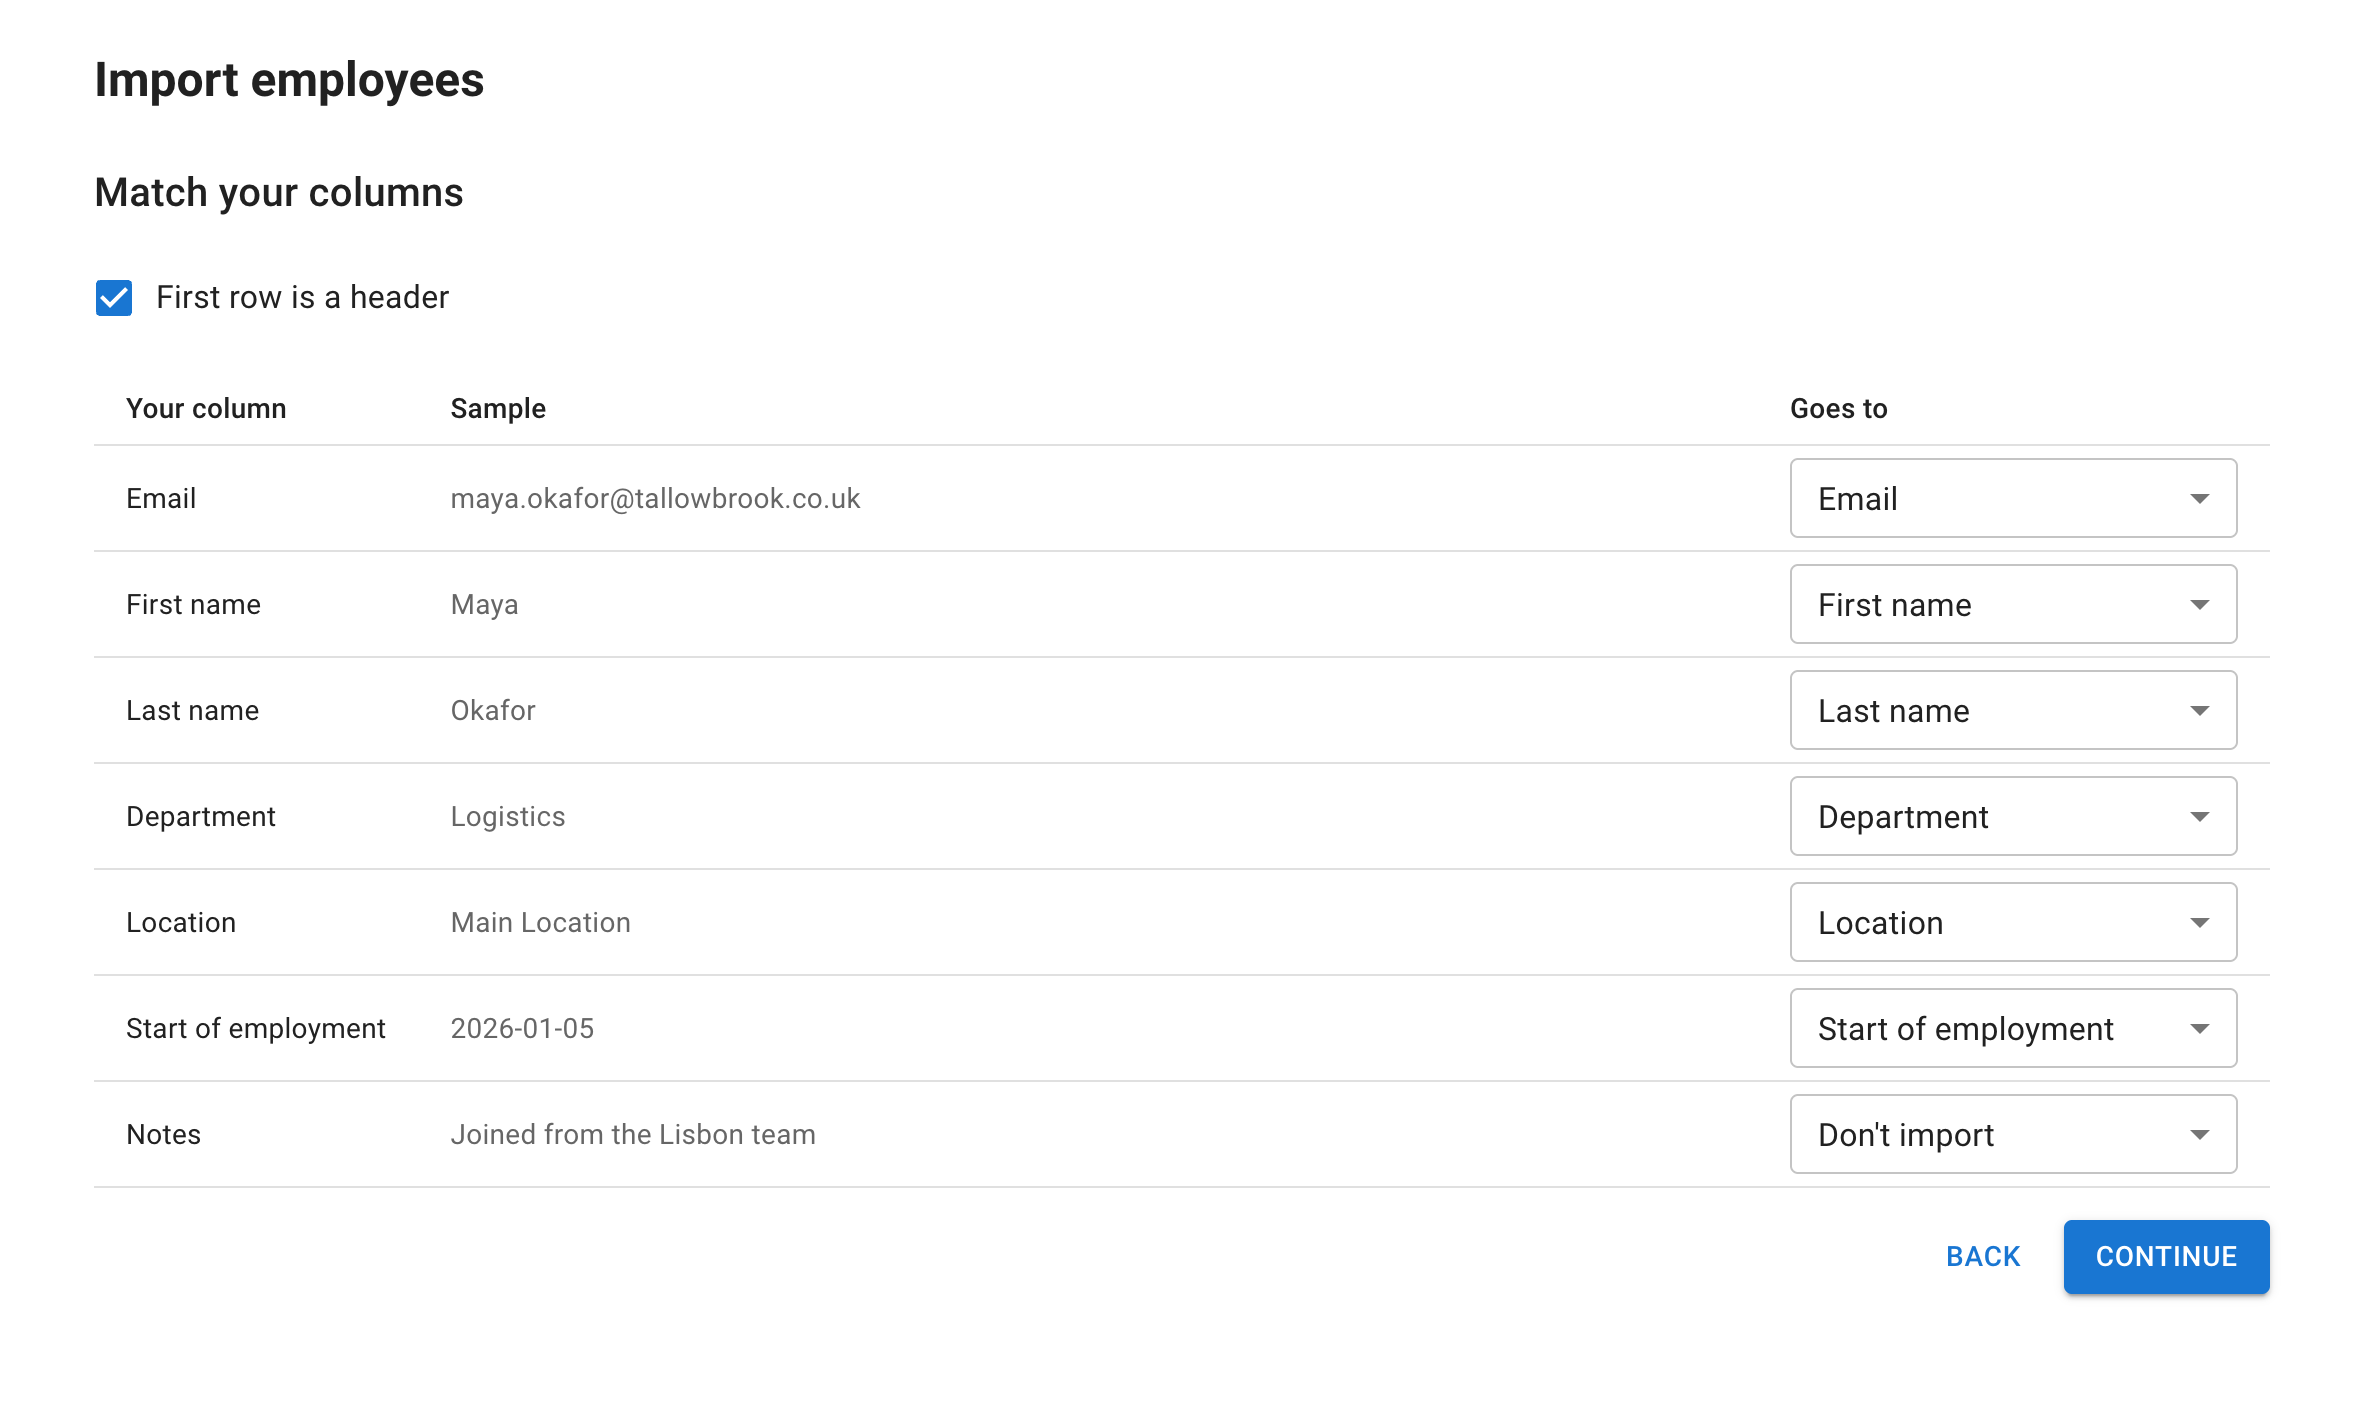
Match your columns lists each column of your sheet under Your column, with a Sample value from it and where it Goes to. Each Goes to starts with the page’s best guess. Check them, and change any that is wrong.
- First row is a header says whether the first row of your sheet names the columns.
- Don’t import leaves a column out.
- Each field goes to one column. Picking a field for a second column takes it from the first.
Continue needs the email and first name columns matched. Until they are, the page says: “Match the email and first name columns to continue.”
Step 3: check the rows
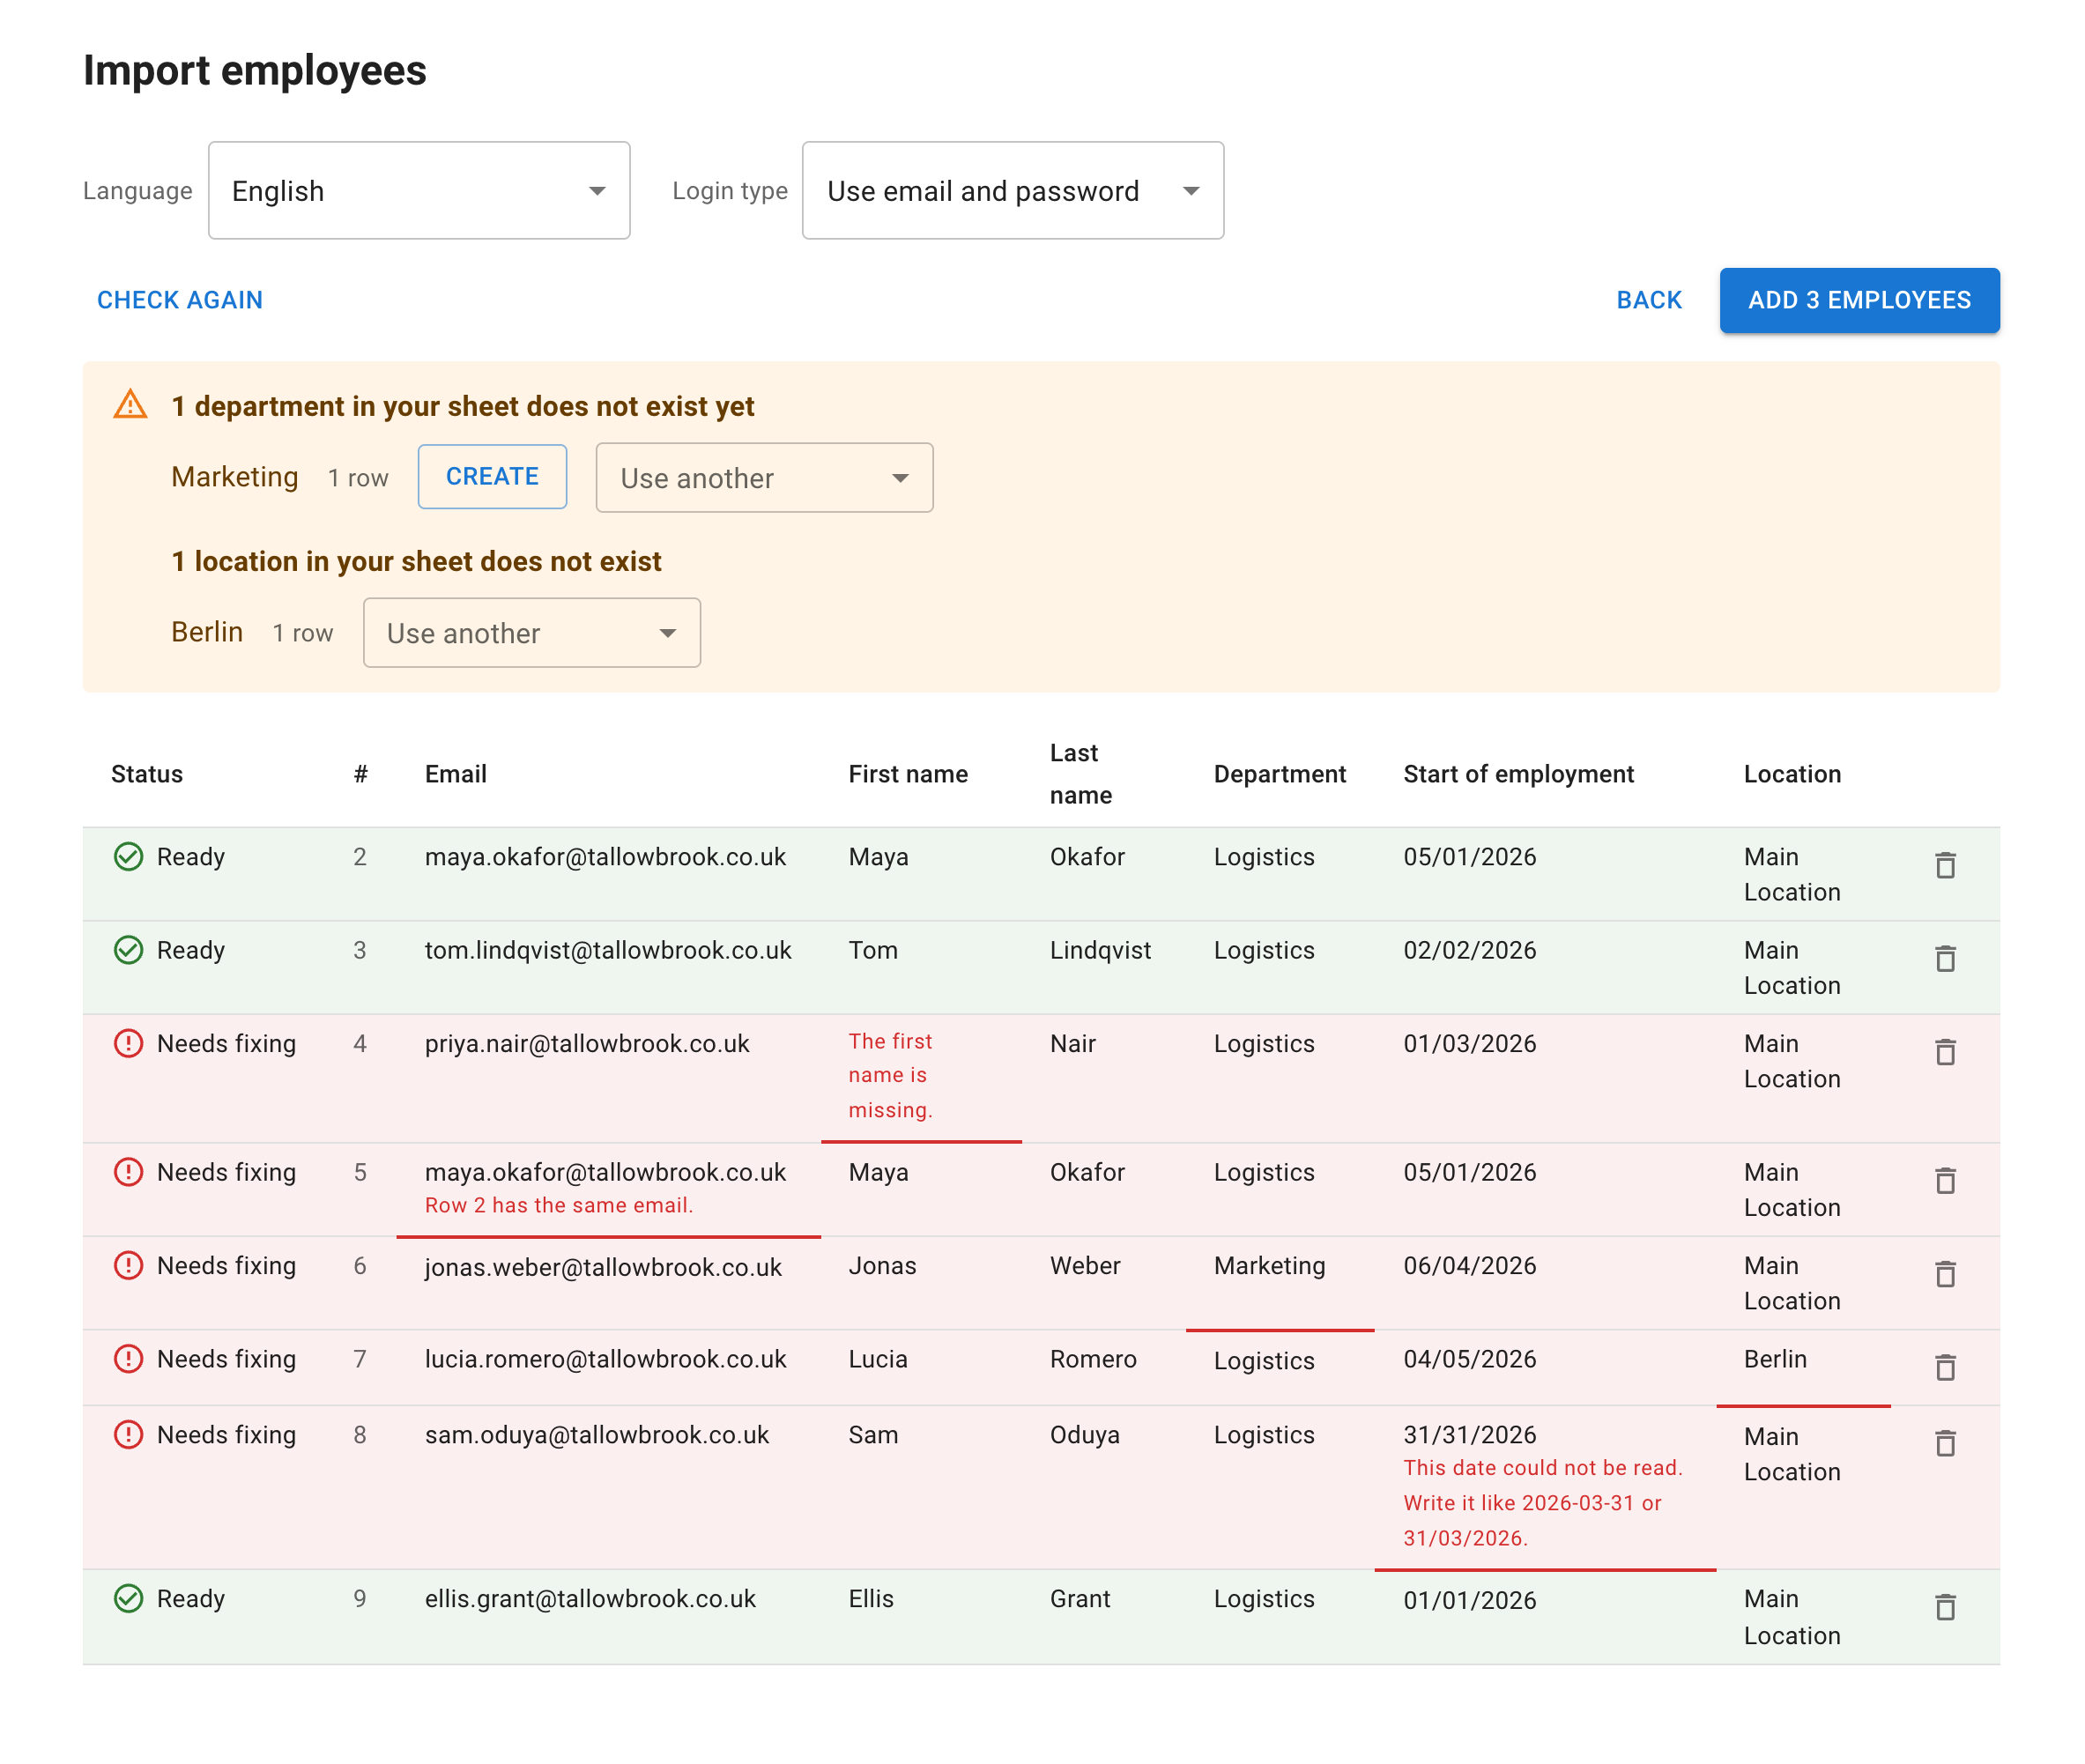
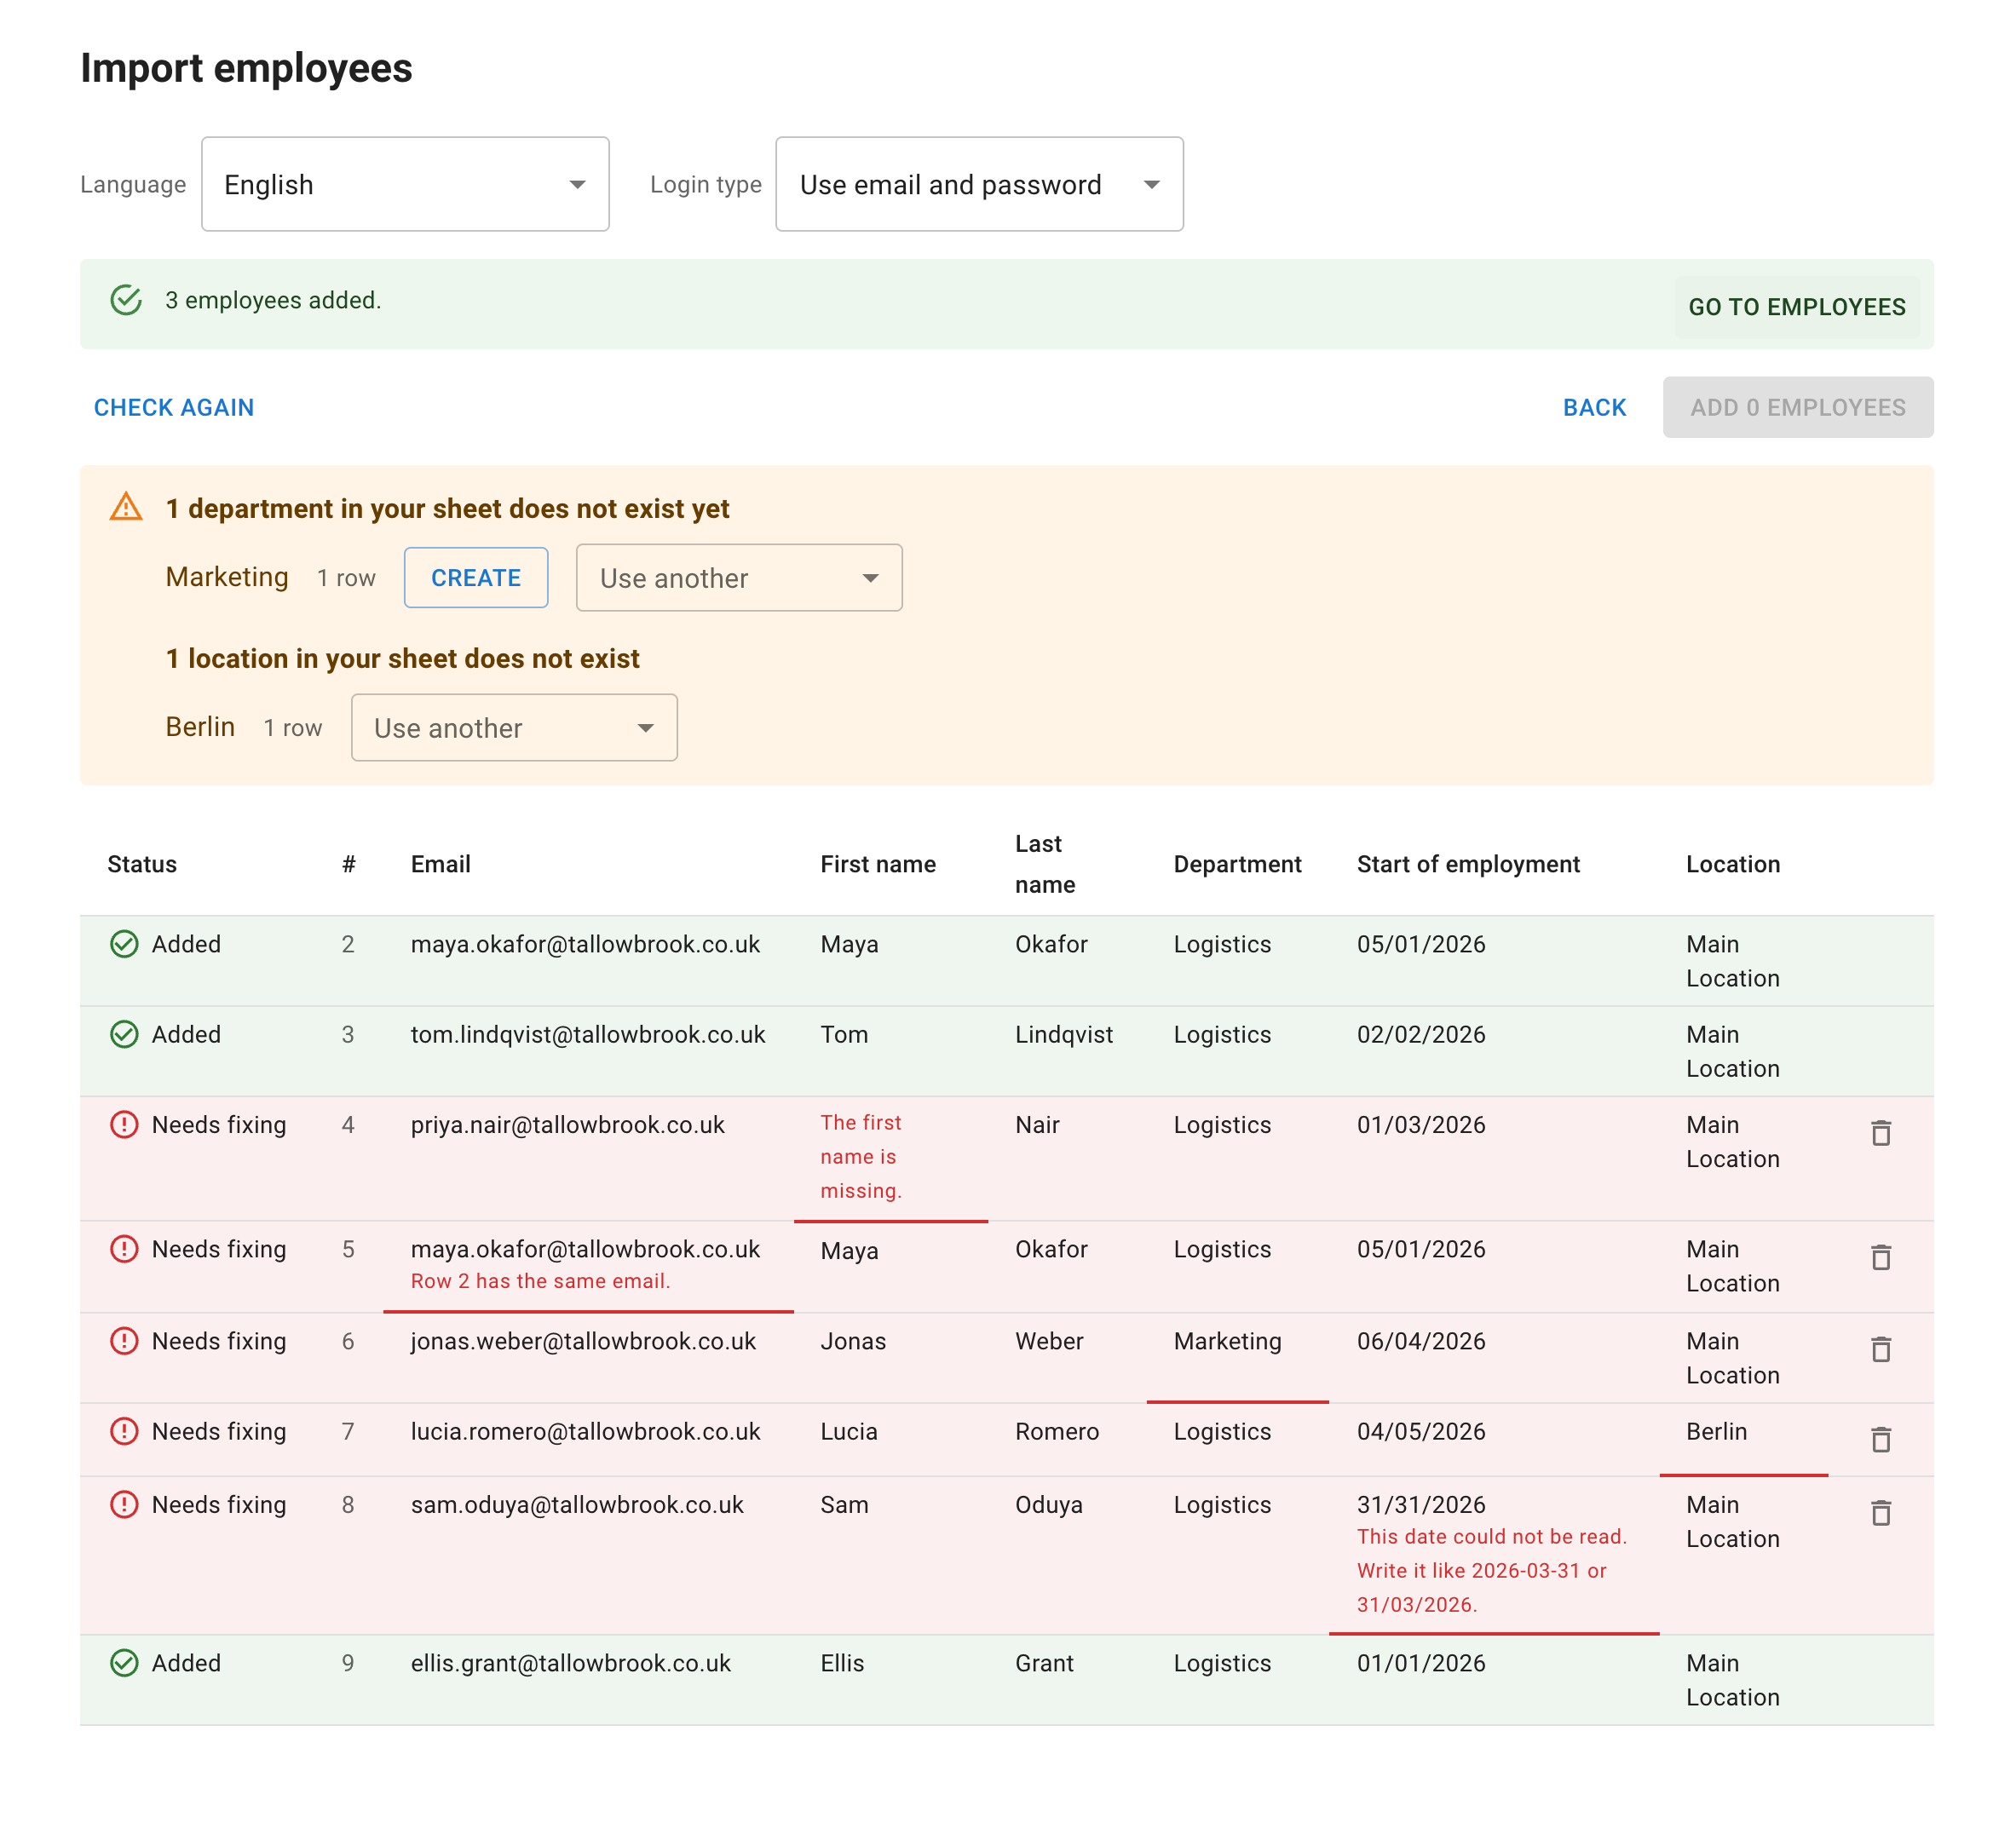
The table shows each employee on a row, with its row number in your sheet (#) and a status. Every row is checked with the same checks as adding one employee with Add new employee:
- Checking: the row is being checked.
- Ready: the row can be added.
- Needs fixing: the row has a problem to fix first.
A problem is said under the cell it is about, or under the status when it is about the whole row. For example:
- “The first name is missing.”
- “Row [number] has the same email.”
- “This email is already in use.”
- “This date could not be read. Write it like …”
A row that could not be checked says so: “This row could not be checked. Press Check again.” Check again checks it once more.
On a trial account, the import takes work email addresses only. A row with a personal address says: “A trial account takes work email addresses only. Personal ones, such as Gmail, cannot be used.”
Fixing a row in the table
A cell you can change shows a hand under the pointer, and Click to edit when the pointer rests on it.
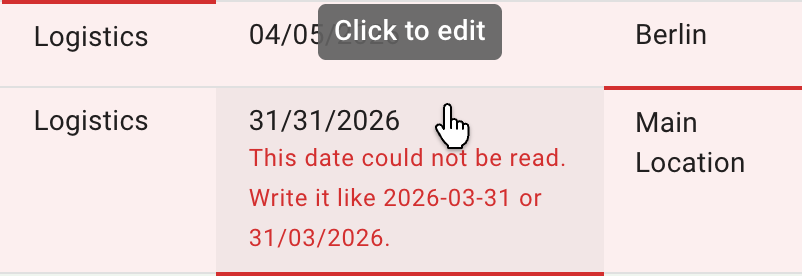
- Click the cell.
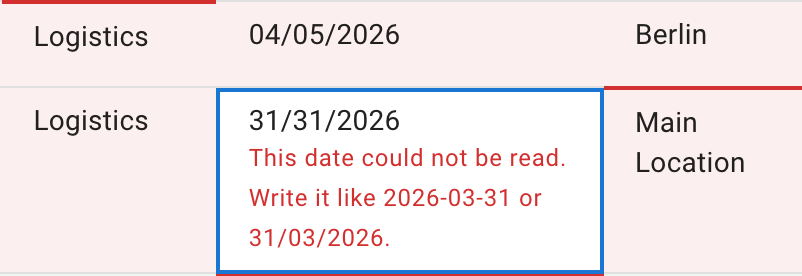
- Type your change.
- Press Enter, or click away, to keep it. Escape leaves the cell as it was.
Department and Location are picked from a list of your company’s own.
A changed row is checked again by itself. To drop a row from the import, select its bin (Remove row).
Dates
Write dates the way the What to paste card shows: as your company writes dates, or as year-month-day. The card gives an example: “Write dates like [date] or [date].” When your company writes dates as year-month-day, it gives one date.
A date the page cannot read is marked under its cell.
An empty Start of employment is filled in with a default date, which the table shows. Check it before adding anyone: their allowance in the year they join can depend on it. See Allowance for employees who join or leave during the year.
Departments and locations your company does not have yet
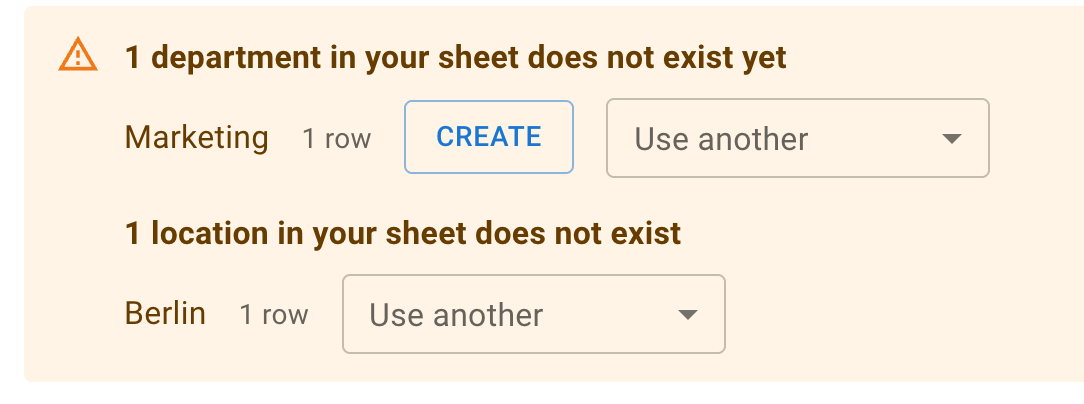
When your sheet names a department or a location your company does not have, a notice above the table lists each name once, with how many rows name it:
- A department that does not exist yet. Create opens the usual new-department form, with the name from your sheet filled in. Use another picks one of your existing departments for all those rows instead.
- Rows with no department are listed as No department, with Use another.
- A location that does not exist. It has Use another only, as locations are not created here. See Managing locations.
A row that names no location is added at your company’s default location.
Language and login type
For everyone in the import, choose:
- Language, which starts as your own
- Login type: Use email and password, Use Sign in with Google or Use Sign in with Microsoft
Add the employees
Add [number] employees adds the Ready rows only, one after another, and shows its progress. Each row shows Adding, then Added or Not added.
Stop stops after the employee being added.
At the end, a summary says how many were added, and that each row not added says why. Go to Employees is beside it.
A row not added
A row not added says why under its status. Fix what it says: the changed row is checked again, and once it is Ready, Add [number] employees adds it.
If the server does not confirm an add, the row says the employee may have been added: “The server did not confirm this one. The employee may have been added: look at the Employees page before adding them again.”
Invite your new employees
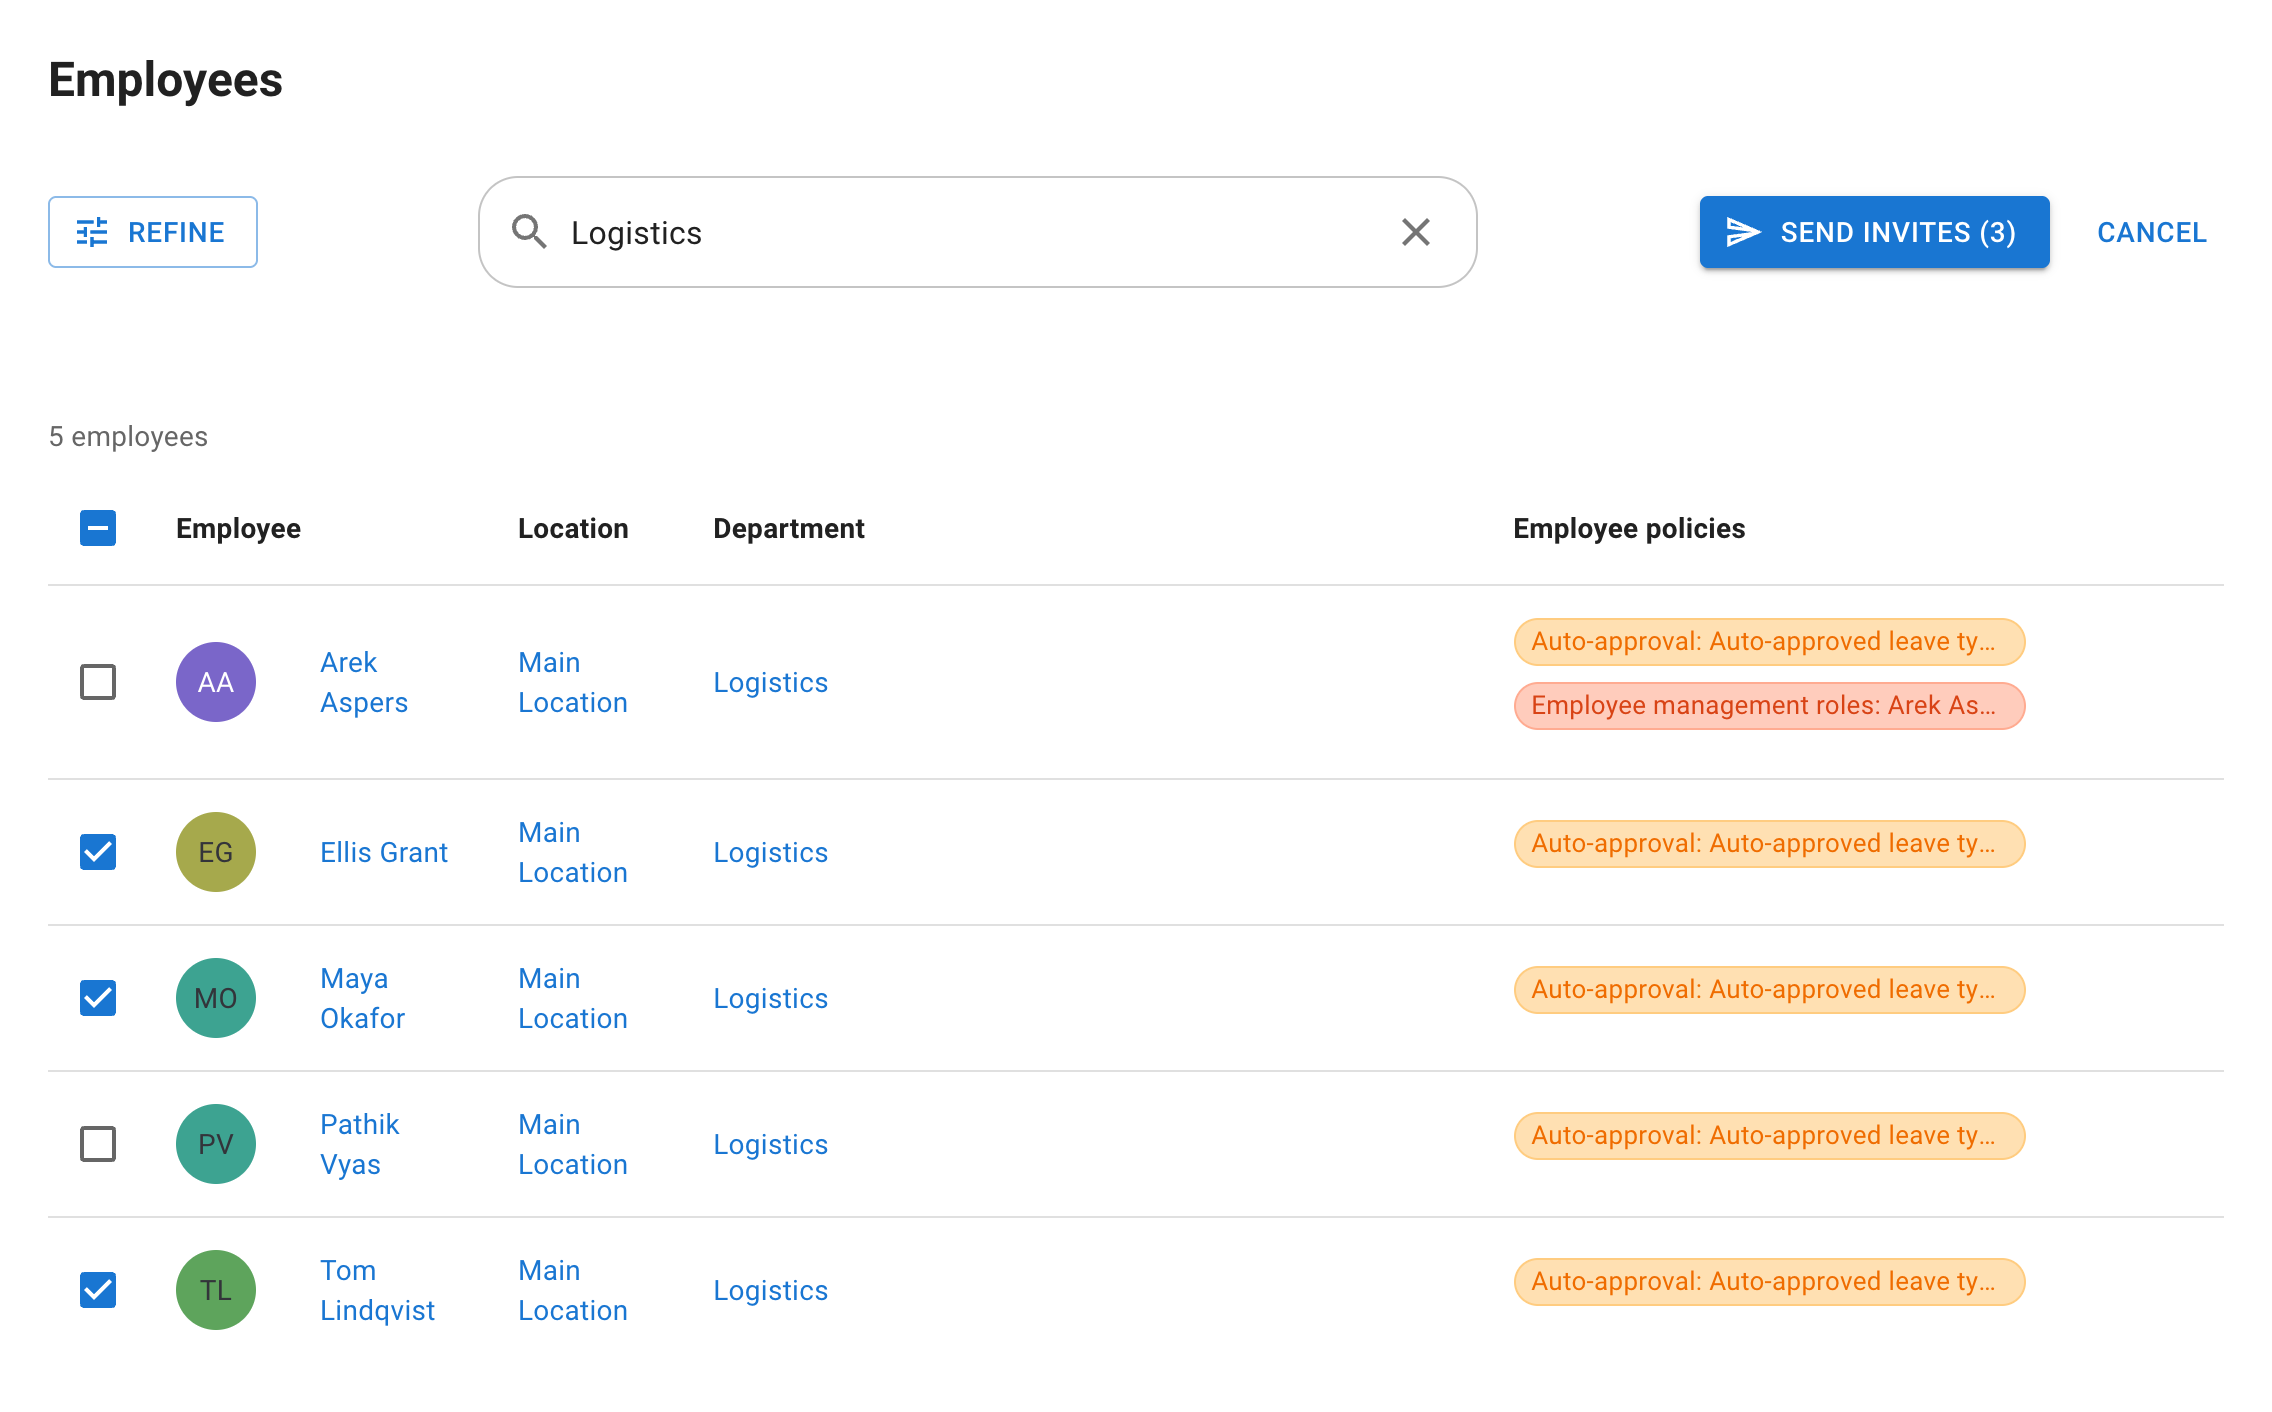
The import sends no emails: it invites nobody. When you are ready, invite the new employees with Invite employees on Employees, or with Send invite email on an employee’s card.
Read more: Sending welcome email to new employee
Good to know
What the import does not set
The new employees are employees, not admins, set up as if you had added each one with Add new employee.
What the import does not carry, you set afterwards on their card:
- an end of employment
- admin rights
- a schedule
- custom fields
- tags
- allowance changes
Their past leave is a separate service: see Import leaves in bulk.
Nothing is saved for later
The table lives in the open page, and nothing is saved for later.
Once you have changed the table or added anyone, Back asks first, because going back discards the table: “Going back discards this table. Employees already added stay added.”
The browser warns you before you close the tab while rows are still waiting.
The audit trail
Each employee the import adds is recorded in the Audit trail as Employee added, as an employee added by hand is.