
Auto-approval policy
An auto-approval policy decides whose leave actions complete the moment they happen, with no manager decision in between. You choose who the policy covers, which actions it auto-approves, and — if you want to narrow it — which leave types it applies to.
This is an administrator’s screen. Employees and managers never see it; they only see the effect, which is a request that is approved the instant it is submitted.
The policy screen introduces itself like this:
An auto-approval policy lets chosen actions complete the moment they happen:
- Own actions: a covered person’s leave requests or revocations are finalised instantly.
- Actions on behalf of others: leave that a covered person books or revokes for employees they manage needs no further approval.
Add a policy, choose who it covers (employees, departments, locations, roles or the whole company), optionally limit it to specific leave types, and pick which actions it auto-approves.
You can run several policies side by side, each with its own name, its own people and its own set of actions.
Nothing is auto-approved unless a policy says so. A company with no auto-approval policies sends every leave request through its usual approval route, exactly as before.
Where to find it
Open Settings → Employee policies. The Employee policies page is a catalogue of tiles, one per kind of policy; the one you want is Auto-approval, described as “Choose whose leave actions are approved automatically”. Opening the tile shows your policies.
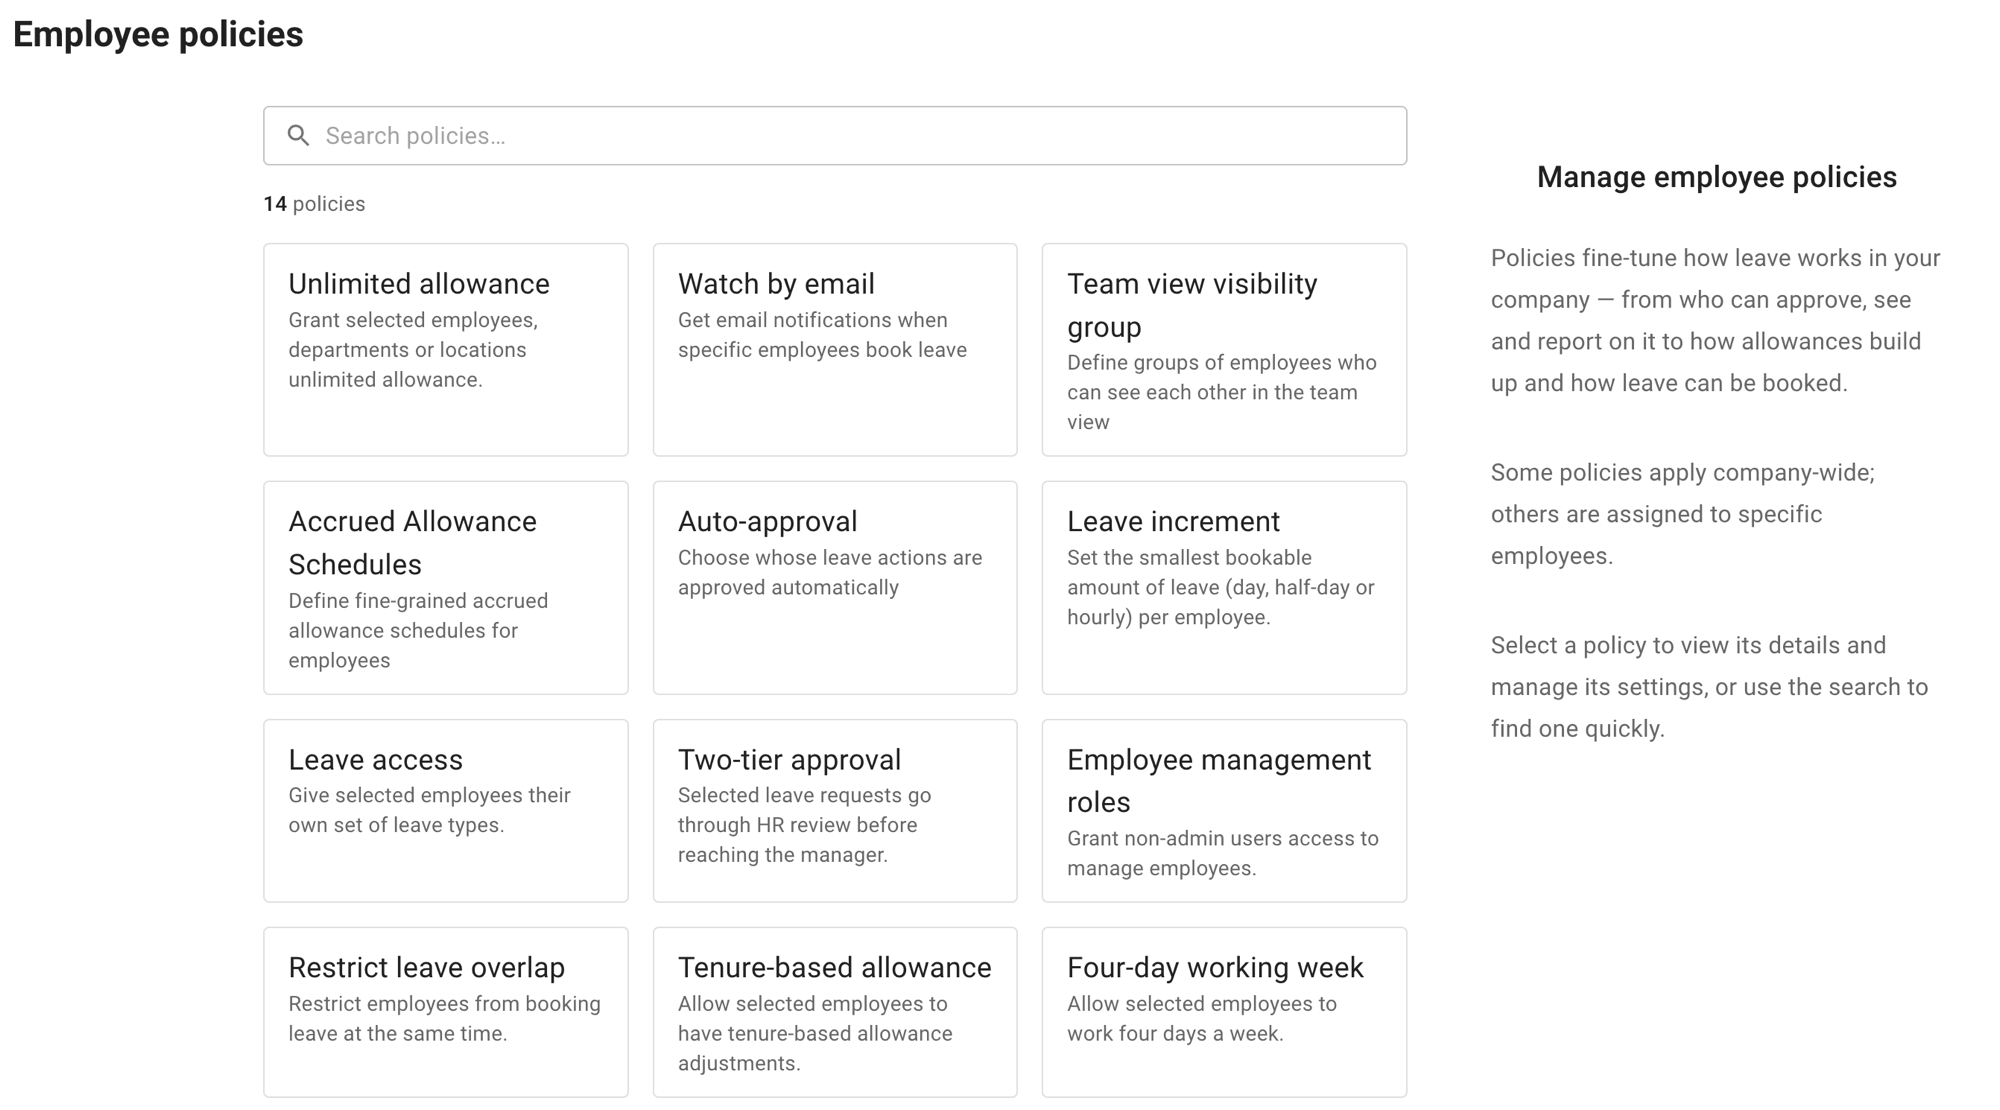
There is a search box above the tiles if it is quicker to type the name than to look for it.
Policies are listed alphabetically as cards. A card collapses to its name and expands to show everything the policy does. The ⋯ menu on a card offers Edit and Delete, and deleting asks you to confirm first.
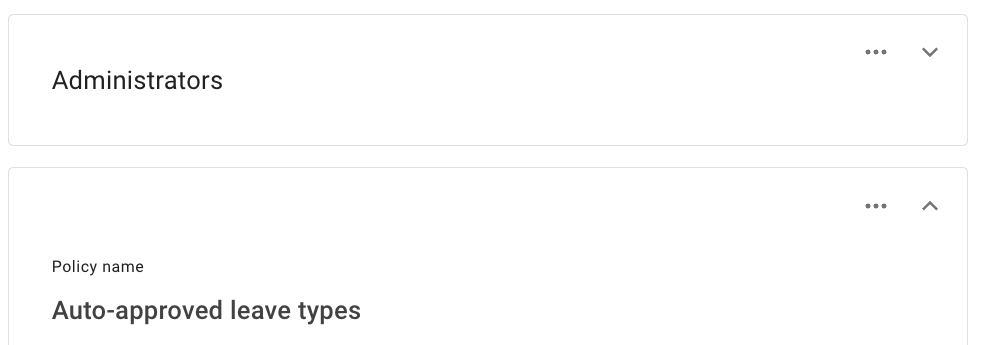
Before you have created anything, the page reads No auto-approval policies yet — “Add the first policy to approve selected leave actions automatically.” — with a New auto-approval policy button. After that, Add creates the next one.
The Auto-approval heading at the top of the page expands into a short explainer, the same one quoted above. It is worth reading once before you set your first policy up.
Creating a policy
Every policy is one card, and you work down it from the top.
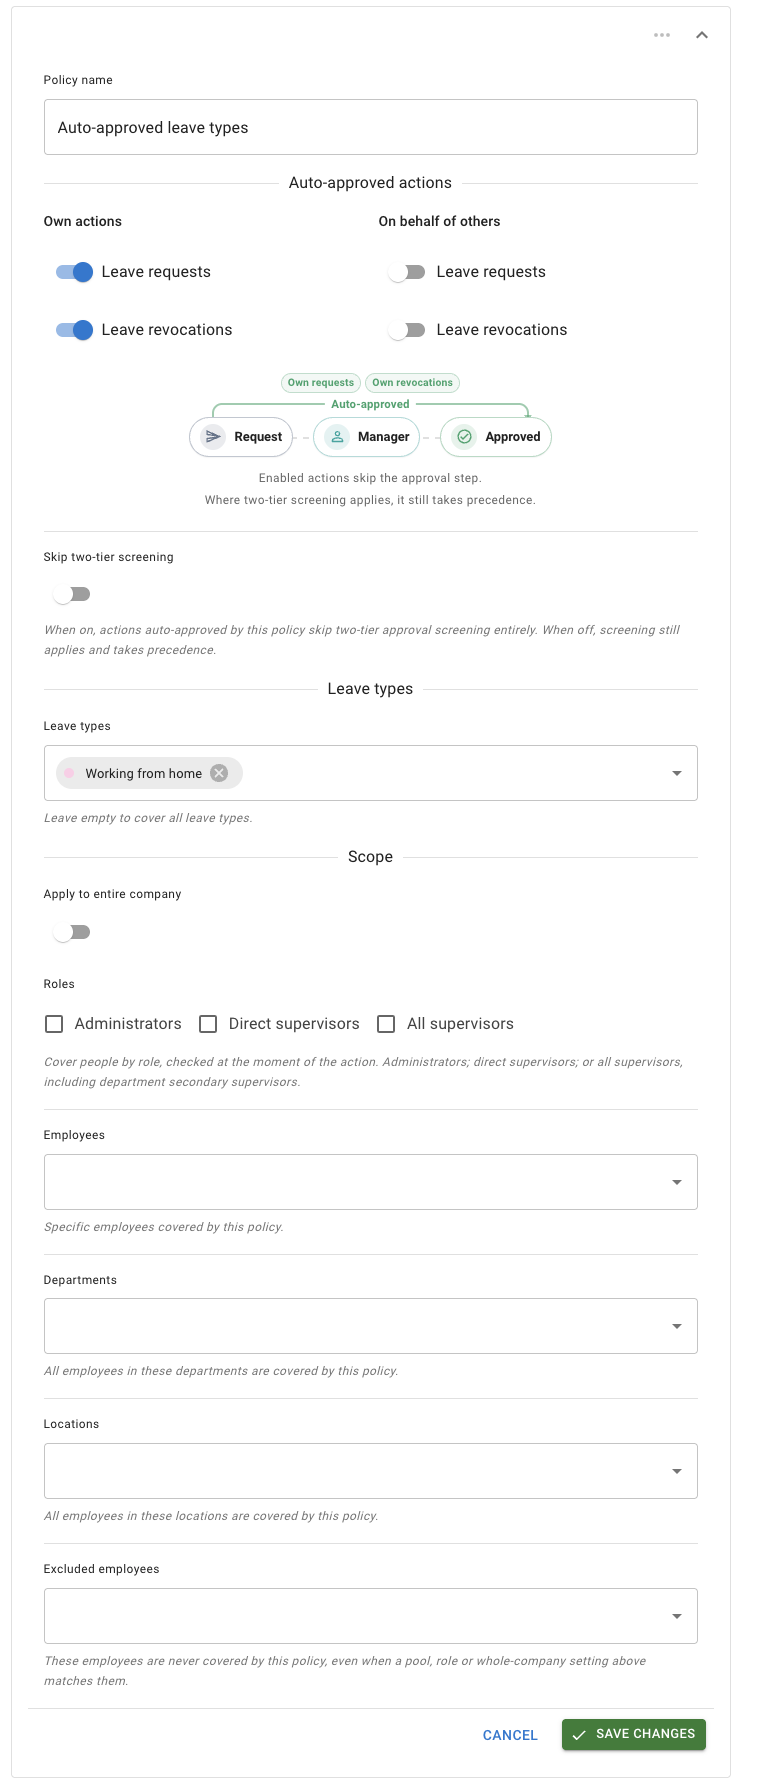
Policy name
Required, and worth spending a moment on. The name is what you and your colleagues see in the list, so make it say who the policy is for — Directors, Working from home, Shift supervisors — rather than Policy 2.
Auto-approved actions
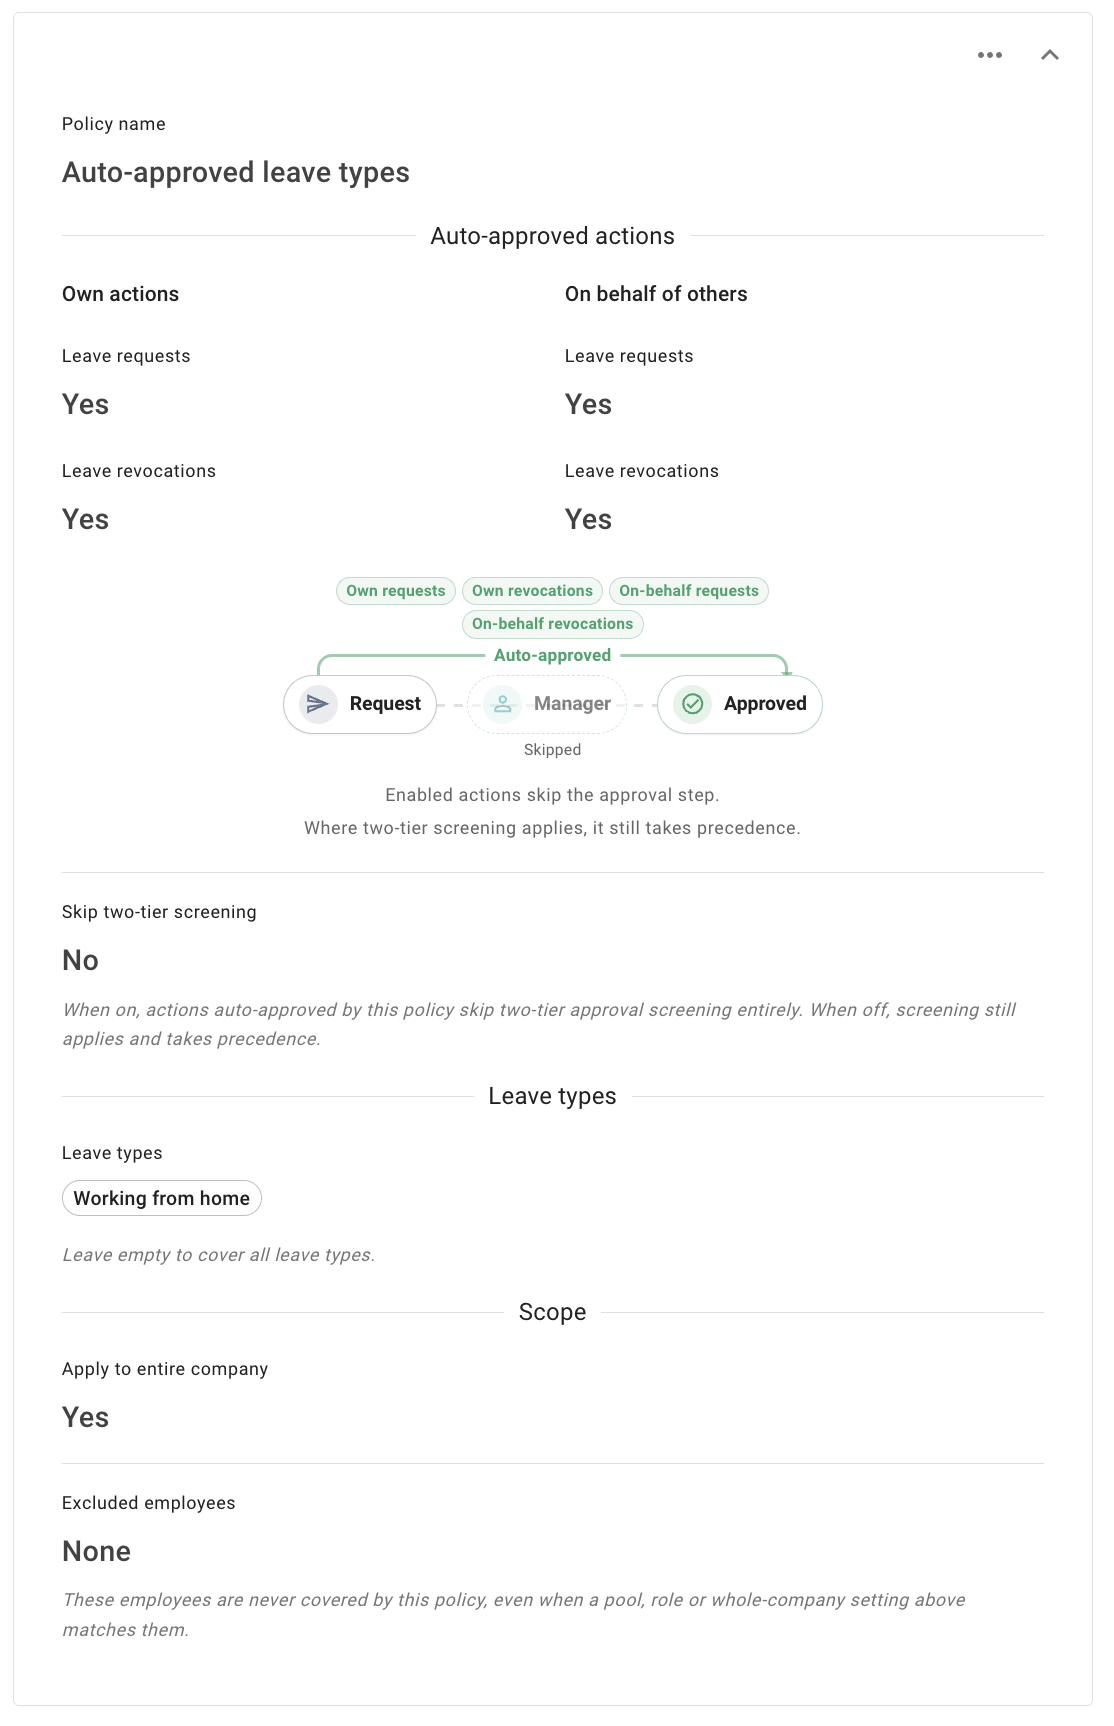
A small grid with two columns, Own actions and On behalf of others, and two switches in each: Leave requests and Leave revocations. A new policy starts with all of them on.
At least one switch has to stay on. Turn them all off and the screen tells you “Enable at least one action — otherwise this policy has no effect.” and will not save.
Underneath the grid, a small diagram shows the route a request normally takes — Request → Manager → Approved — with the actions you have switched on riding an Auto-approved arc that skips the manager step. It redraws as you flick the switches, so you can see what the policy will do before you save it.
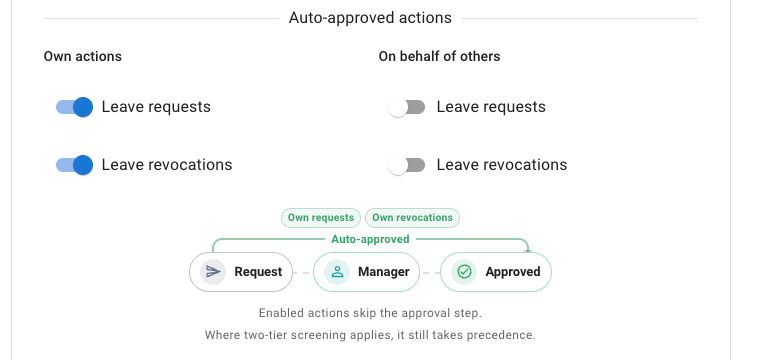
In the example above only the two Own actions switches are on, so only those two ride the arc. Leave that person books for somebody else still goes to a manager, which is why the Manager step is still in the picture.
Skip two-tier screening
One switch, with the helper text “When on, actions auto-approved by this policy skip two-tier approval screening entirely. When off, screening still applies and takes precedence.” See How it works with two-tier approval below.
Leave types
Pick the leave types the policy applies to, or leave the picker empty to cover all of them — “Leave empty to cover all leave types.” A policy that covers everything reads as All leave types on the card.
Scope
This is where you say who the policy covers:
- Apply to entire company — a switch. Turn it on and the pickers below are hidden, because the policy already covers everybody.
- Roles — three checkboxes: Administrators, Direct supervisors and All supervisors, with the helper “Cover people by role, checked at the moment of the action. Administrators; direct supervisors; or all supervisors, including department secondary supervisors.”
- Employees, Departments and Locations — the same pickers you will know from the other employee policies. Naming a department or a location covers everyone in it.
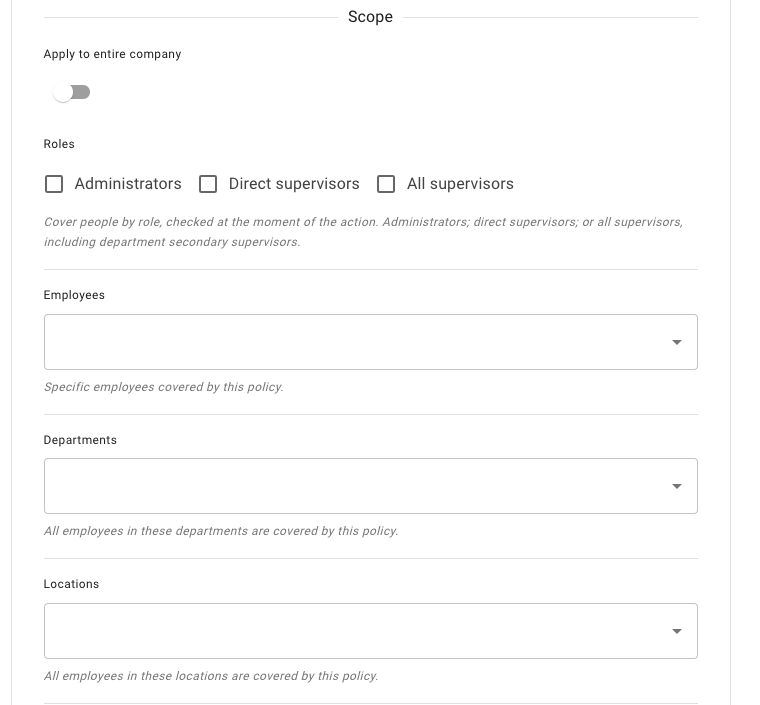
You can combine these freely. A policy might cover two named employees, everyone in one location, and every administrator.
Excluded employees
The last picker, and the one that overrides everything above it: “These employees are never covered by this policy, even when a pool, role or whole-company setting above matches them.” Use it when a policy is right for a group apart from one or two people.
Saving
Save changes and Cancel sit in an action bar pinned to the bottom of the screen, so they stay in reach however long the card gets.
Choosing who is covered
Any combination of named employees, whole departments, whole locations, roles, or the entire company — minus anyone you have excluded.
Roles are worth understanding, because they are the part that keeps working on its own. A role is checked at the moment somebody acts, not at the moment you write the policy. Appoint a new manager next month and they are covered from that day, with nobody editing anything. The same is true in reverse when somebody stops being a manager.
For actions on behalf of others, Direct supervisors and All supervisors mean a supervisor of the employee concerned; for own actions the role simply means that person holds it.
An employee can fall under more than one policy, and it is enough that one of them grants the action. This matters when you set exclusions: excluding somebody from a policy takes them out of that policy only, so if another policy still covers them, their leave is still auto-approved.
Choosing what is auto-approved
Two questions decide this: whose action is it, and what kind of action is it.
Own actions are what a covered person does with their own leave. On behalf of others is what they do for the employees they manage — and an administrator booking for anyone in the company counts as acting on behalf of others.
Within each of those, you can auto-approve Leave requests, Leave revocations, or both. So a policy can grant requests only, revocations only, own actions only, on-behalf actions only, or any mix.
The two sides are genuinely separate. A manager whose policy only grants on-behalf actions can book leave for their team without a decision, while their own leave request still goes to their approver.
Add leave types on top of that if you want a narrower policy — for example, one that auto-approves working-from-home days for the whole company and nothing else.
How it works with two-tier approval
If a two-tier approval policy also applies to a request, the screening step still happens first and takes precedence — the request goes for screening rather than being approved outright.
The exception is Skip two-tier screening. Turn that on, and actions this policy auto-approves skip the screening step entirely.
If you have set up an auto-approval policy and requests still arrive with HR or whoever screens them first, this is almost always why.
What employees and managers see
The employee sees the result straight away. A covered request goes to approved as it is submitted; a covered revocation is finalised there and then. There is nothing to wait for and nothing to chase. The one thing that can still come in between is two-tier screening, which happens first unless the policy is set to skip it.
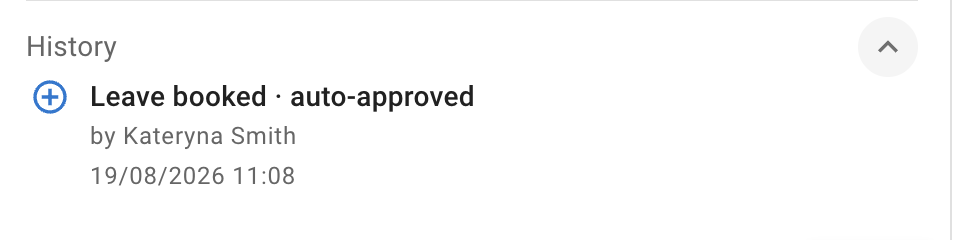
The leave says how it was approved. In the leave’s own History section, the step is marked as auto-approved, so anybody looking at the record later can see that no manager actioned it. Read more: Audit trail
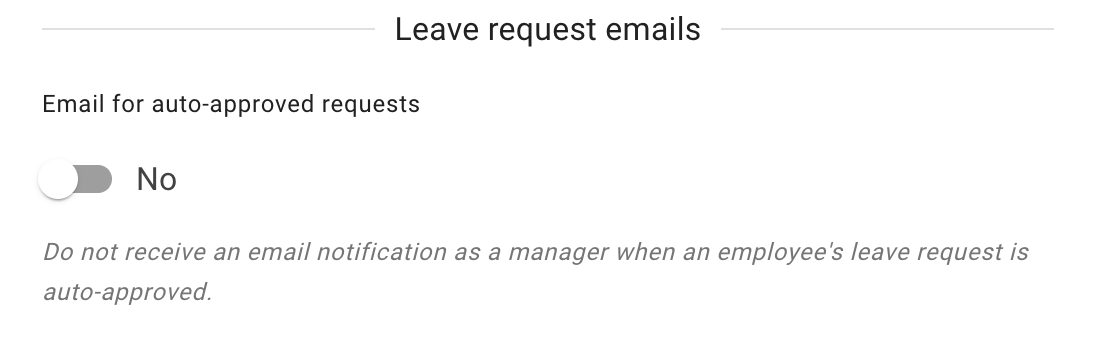
Managers hear about it unless they say otherwise. A manager receives the usual email about a request a policy approved, worded to say it was auto-approved. That is on to begin with, so adding a policy does not quietly stop managers hearing about their team’s leave.
Any manager who would rather not get them turns them off for themselves, in My profile under Leave request emails, as Email for auto-approved requests. The line beneath the switch says which way it is currently set. It is an individual setting: an administrator cannot switch it off on somebody else’s behalf, and it is not part of the policy.
If you used the old auto-approve settings
Auto-approval used to be spread across several screens. Those controls have been removed, and an auto-approval policy is now the only place it is set up.
Existing companies were converted automatically, and your previous set-up carries over as named policies:
| Old setting | Where it used to be | Now a policy named |
|---|---|---|
| Auto-approve for admins | Advanced settings | Administrators |
| Auto-approve for supervisors (and secondary supervisors) | Advanced settings | Supervisors |
| The Auto-Approve checkbox on a leave type | Leave types | Auto-approved leave types |
| Auto-approve leave requests on an employee | Employee details and the new employee form | Individual auto-approve |
If one of those settings was switched off on your account, you simply have no policy for it.
There is nothing you have to redo. It is still worth opening Settings → Employee policies → Auto-approval once and reading the converted policies through — the Auto-approved actions grid in particular, so you can see exactly which actions each one auto-approves and for whom. From there they are ordinary policies: rename them, adjust who they cover, switch off any actions you do not want, or delete them.
Brand-new companies start with no auto-approval policies at all. If you want any leave auto-approved, add a policy.
Frequently asked questions
Where has my auto-approve setting gone? Into a policy. The four old settings became the named policies in the table above — open Settings → Employee policies → Auto-approval and you will find yours there.
I have set a policy up, but requests still wait for HR. A two-tier approval policy takes precedence over auto-approval. Either that is what you want, or you turn on Skip two-tier screening in the auto-approval policy.
I excluded somebody, but their leave is still auto-approved. Exclusions apply to one policy. If another policy reaches that person — through a role, a department, a location or the whole company — it can still grant the action. Look through your other policies for one that covers them and auto-approves that action.
Nothing is auto-approved on my new account. New companies start with no auto-approval policies, and nothing is auto-approved until you add one.
A manager’s own leave request was not auto-approved. Check the Own actions column. The On behalf of others switches only cover leave that person books or revokes for somebody else, never their own. Worth checking two more things on the same card: that the policy’s roles or pickers actually reach them, and that its Leave types picker covers the leave type they asked for — a policy narrowed to particular leave types leaves the rest to the normal approval route.
The policy will not save. Two things stop it: a missing name, and every action switched off. A policy needs at least one action enabled to do anything.
Managers are still getting emails about auto-approved requests. They arrive by default, and there is nothing in the policy that turns them off. Each manager stops their own under My profile → Leave request emails → Email for auto-approved requests. Because it is an individual setting, you cannot do it for them.
That switch covers the auto-approved-request email and nothing else. If someone still gets messages about a colleague’s leave after turning it off, look at what else is sending them — a Watch by Email policy emails its owners whenever somebody they watch books leave, and it has its own settings.